CCMini
Custom 3D-Printer that explores a different type of motion system compared to standard COTS printers - a cantilevered cross gantry design that aims to push the limits of what it can actually do
Skills
Project Overview
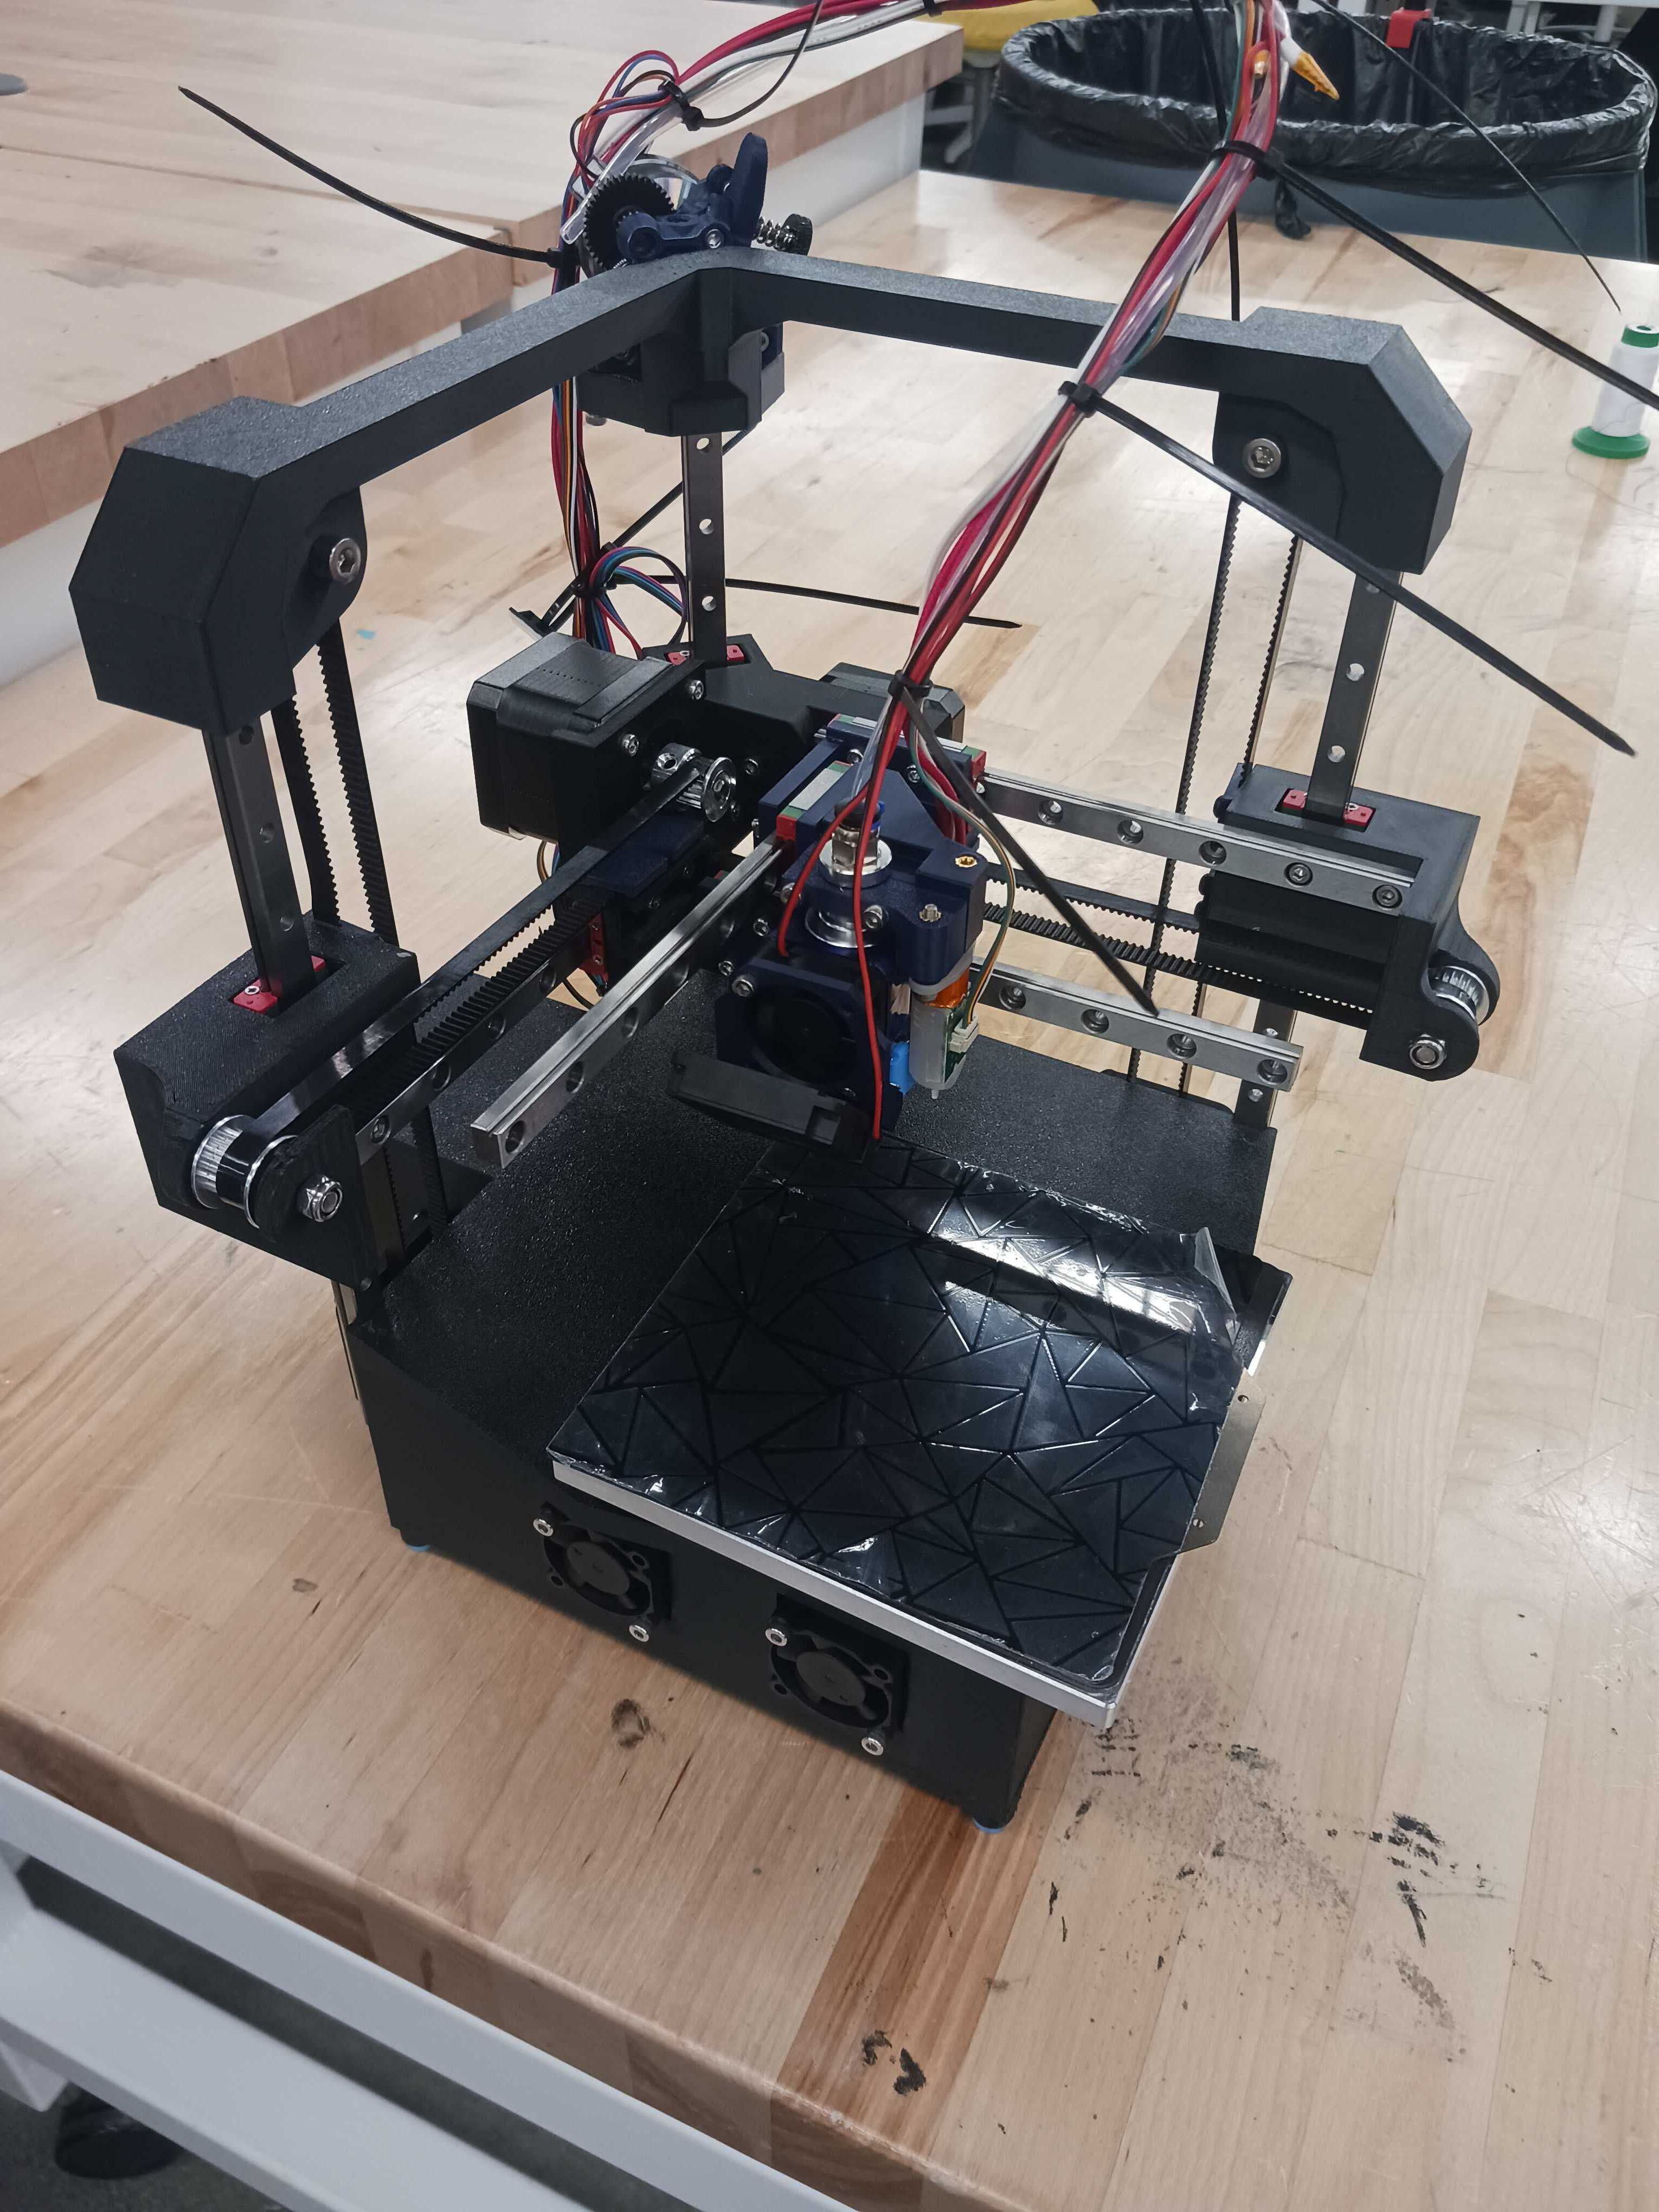
CCMini is an experimental printer designed to explore a cantilevered cross gantry printer on a small scale with only a 120mm x 120mm bed, hence the name. I wanted to create a design that I could use to test the limits of this kinematic system while also creating a function printer.
Design Overview
Fully designed in Onshape, this printer requires no subtractive manufacturing in a typical shop environment, only another 3D printer to make all the parts required.
Frame and Electronics
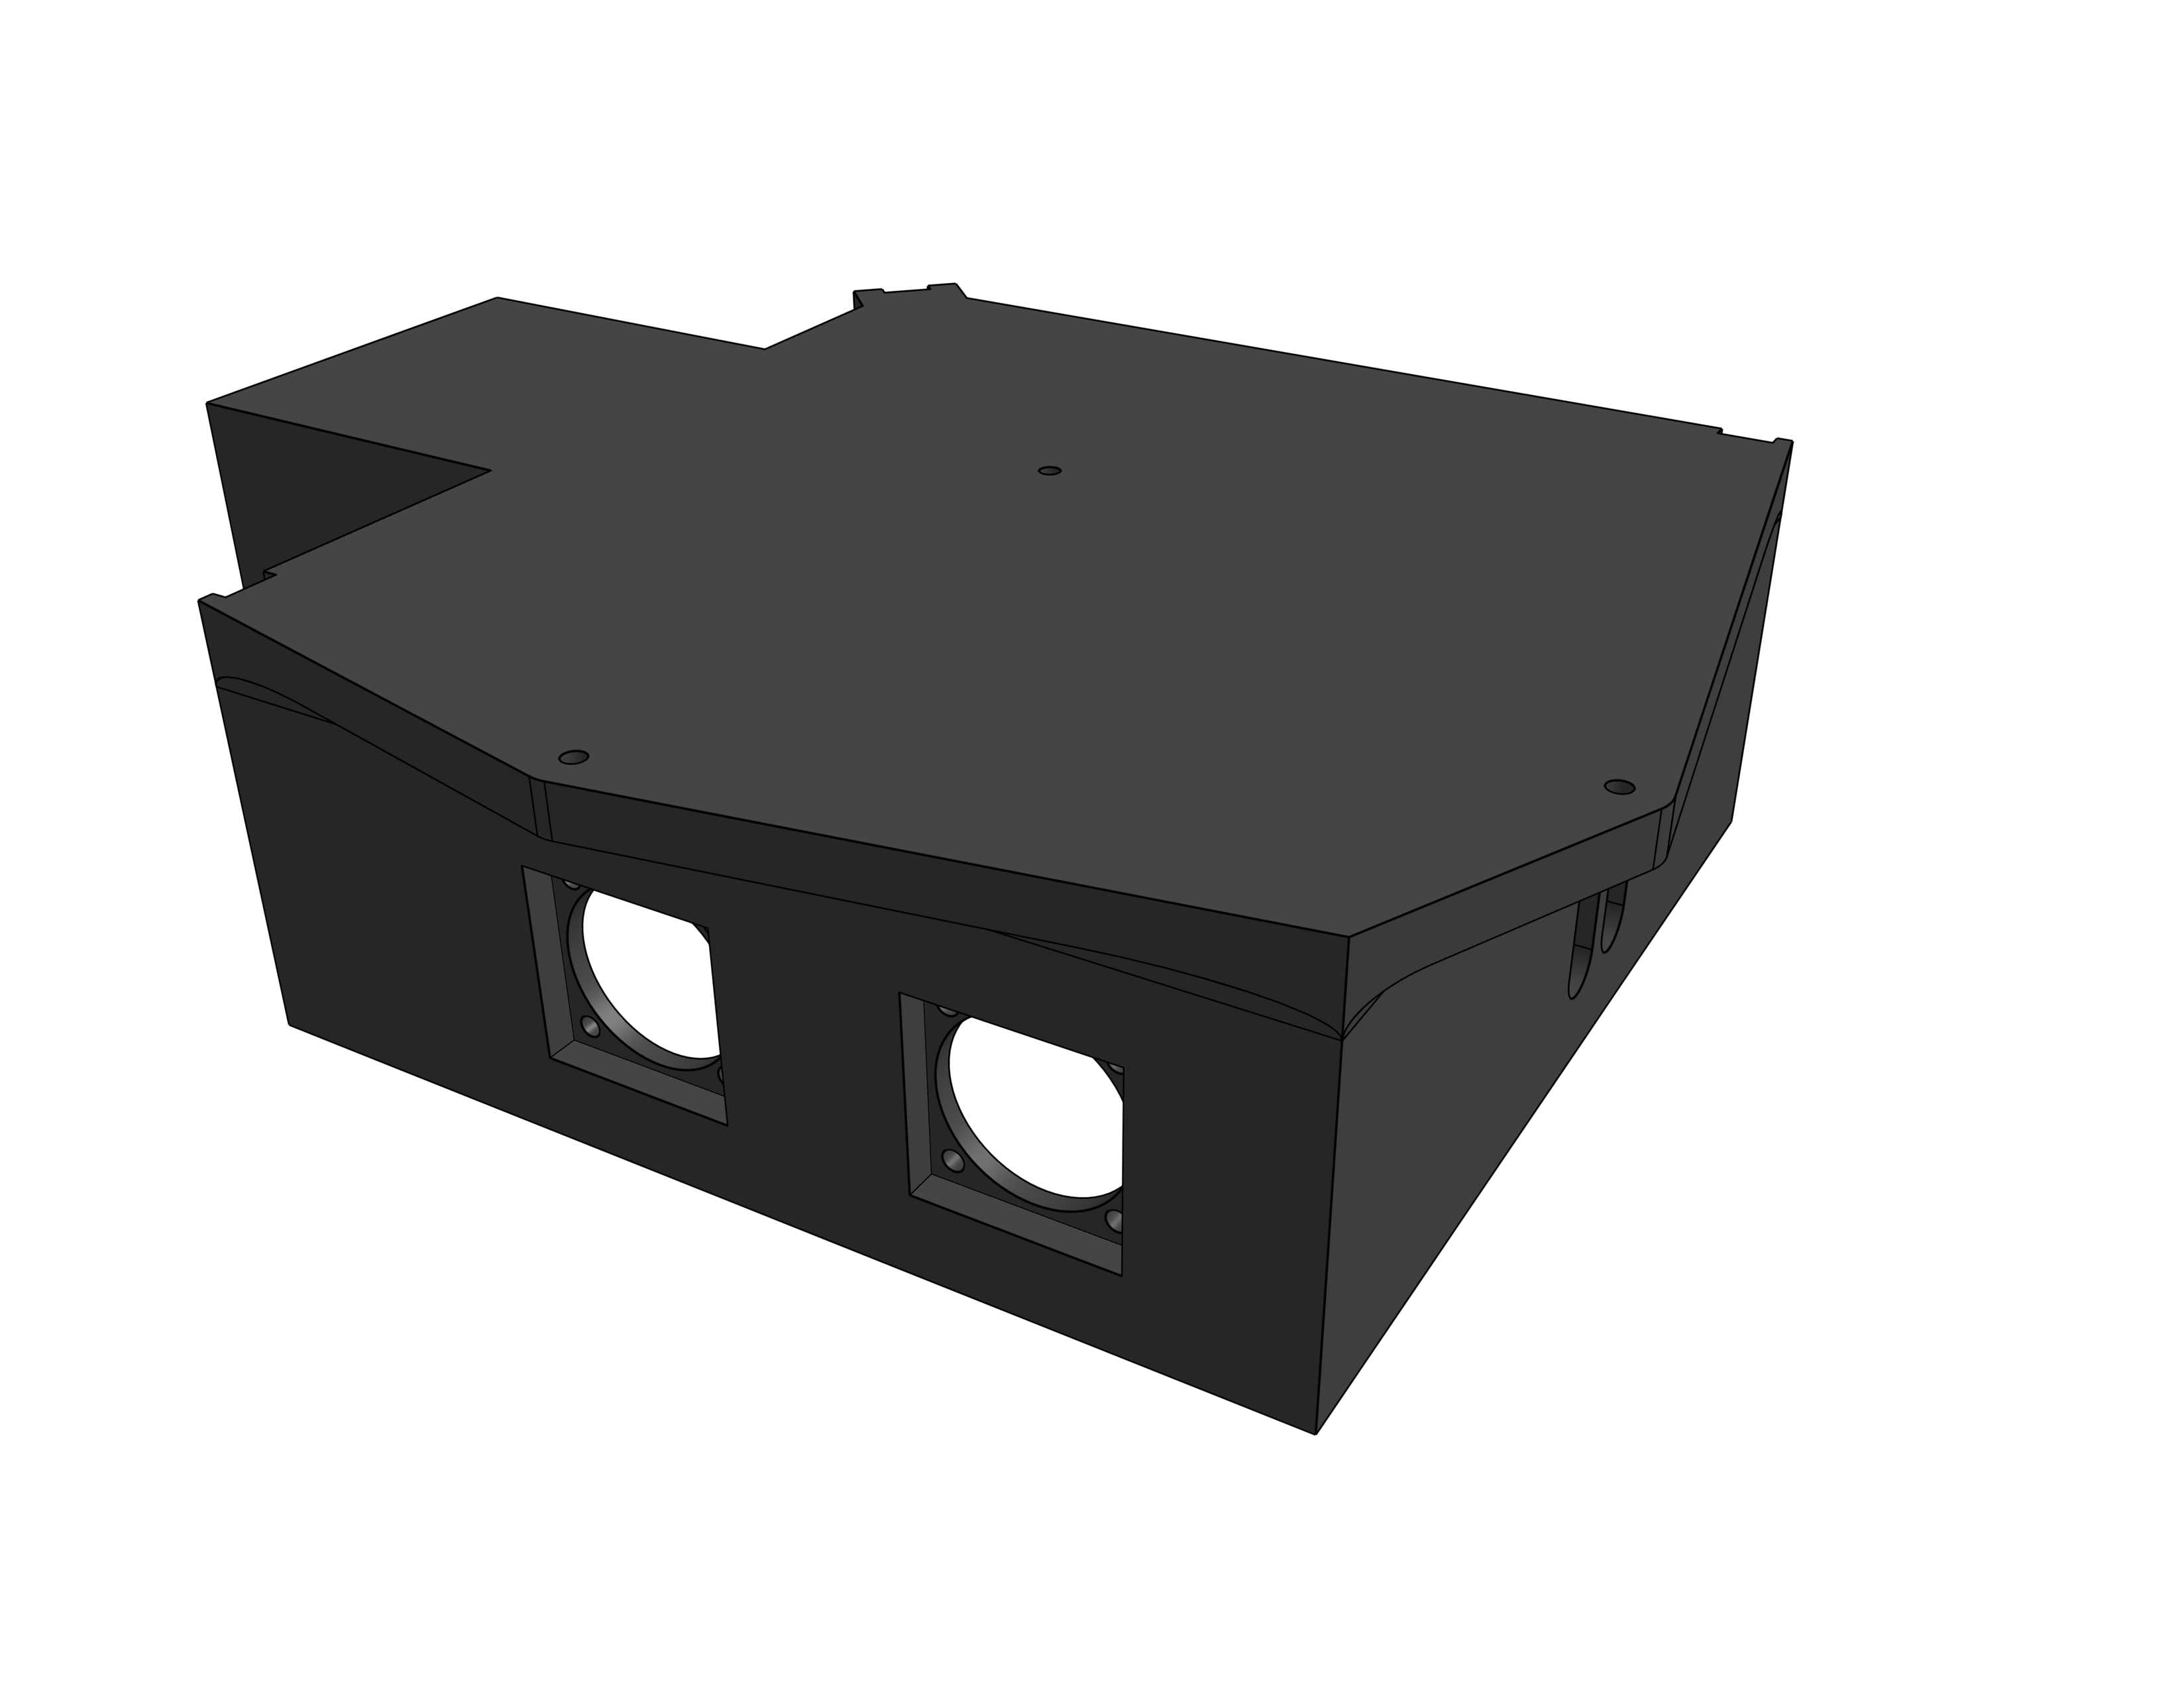
CCMini’s frame was designed to be 3D printed. This was done because the small size and footprint of the machine allowed for this to be possible. This makes the printer easier to manufacture and allows me to build in the electronics mounts directly to the frame.
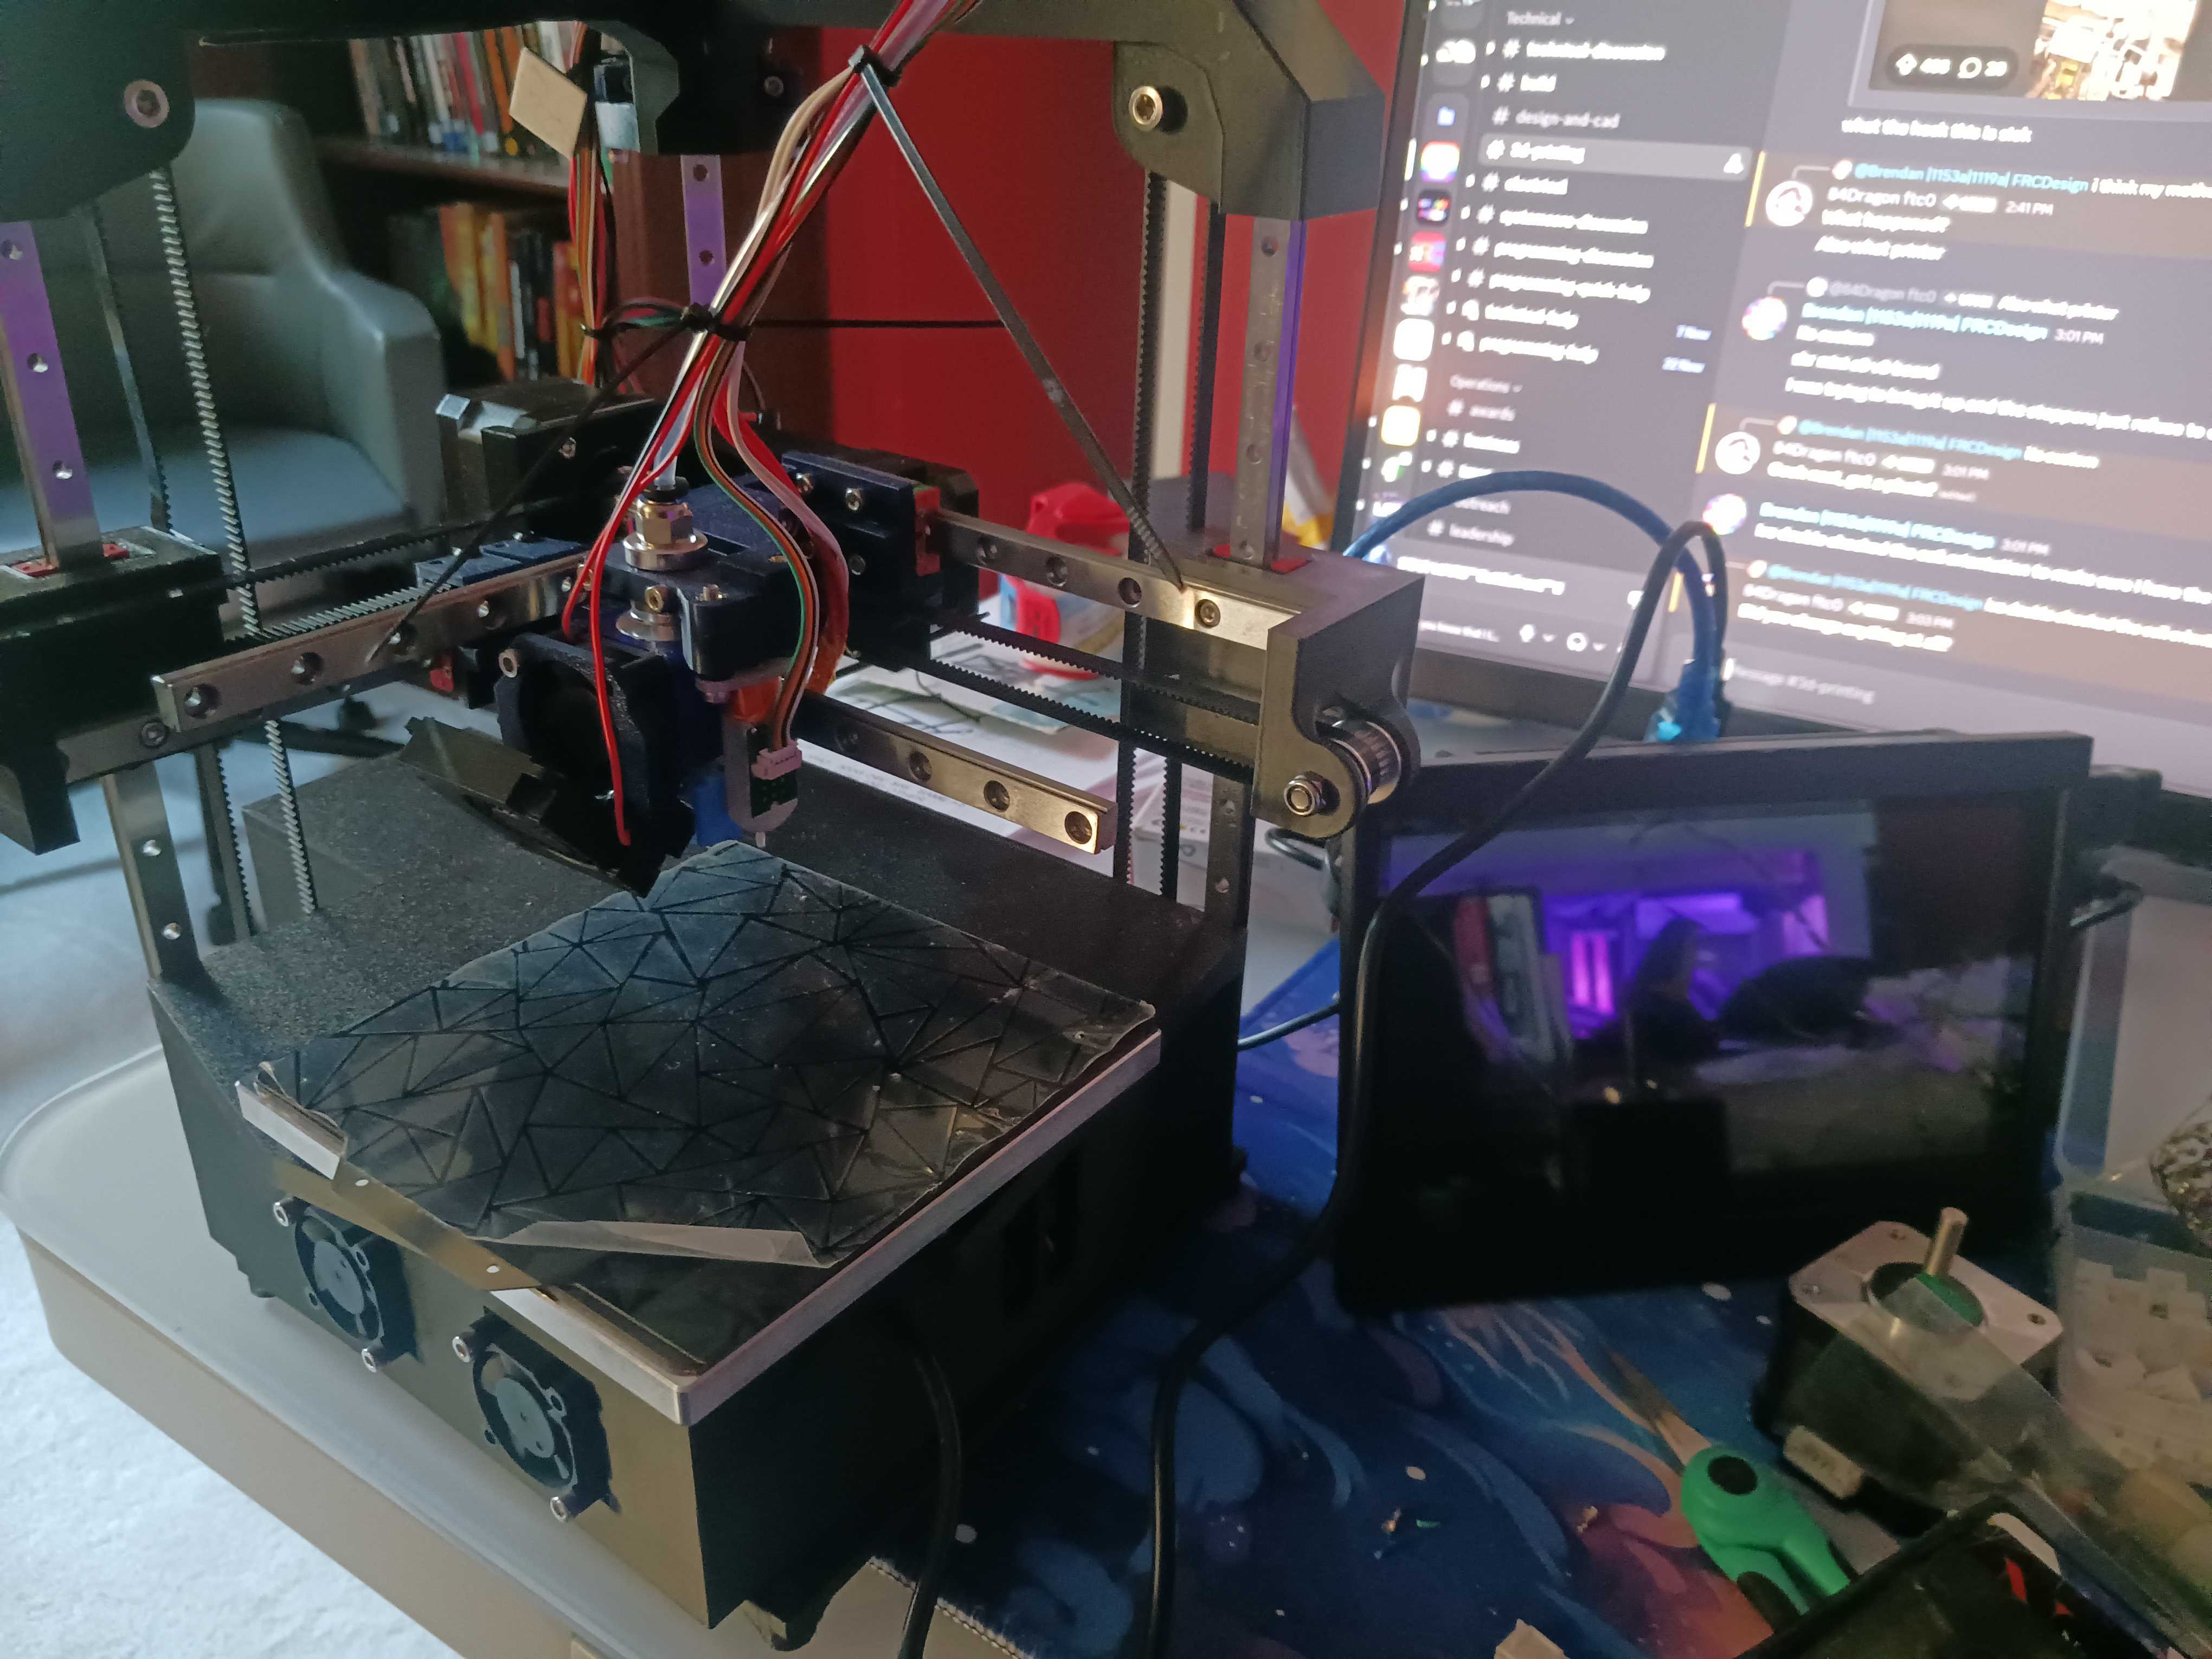
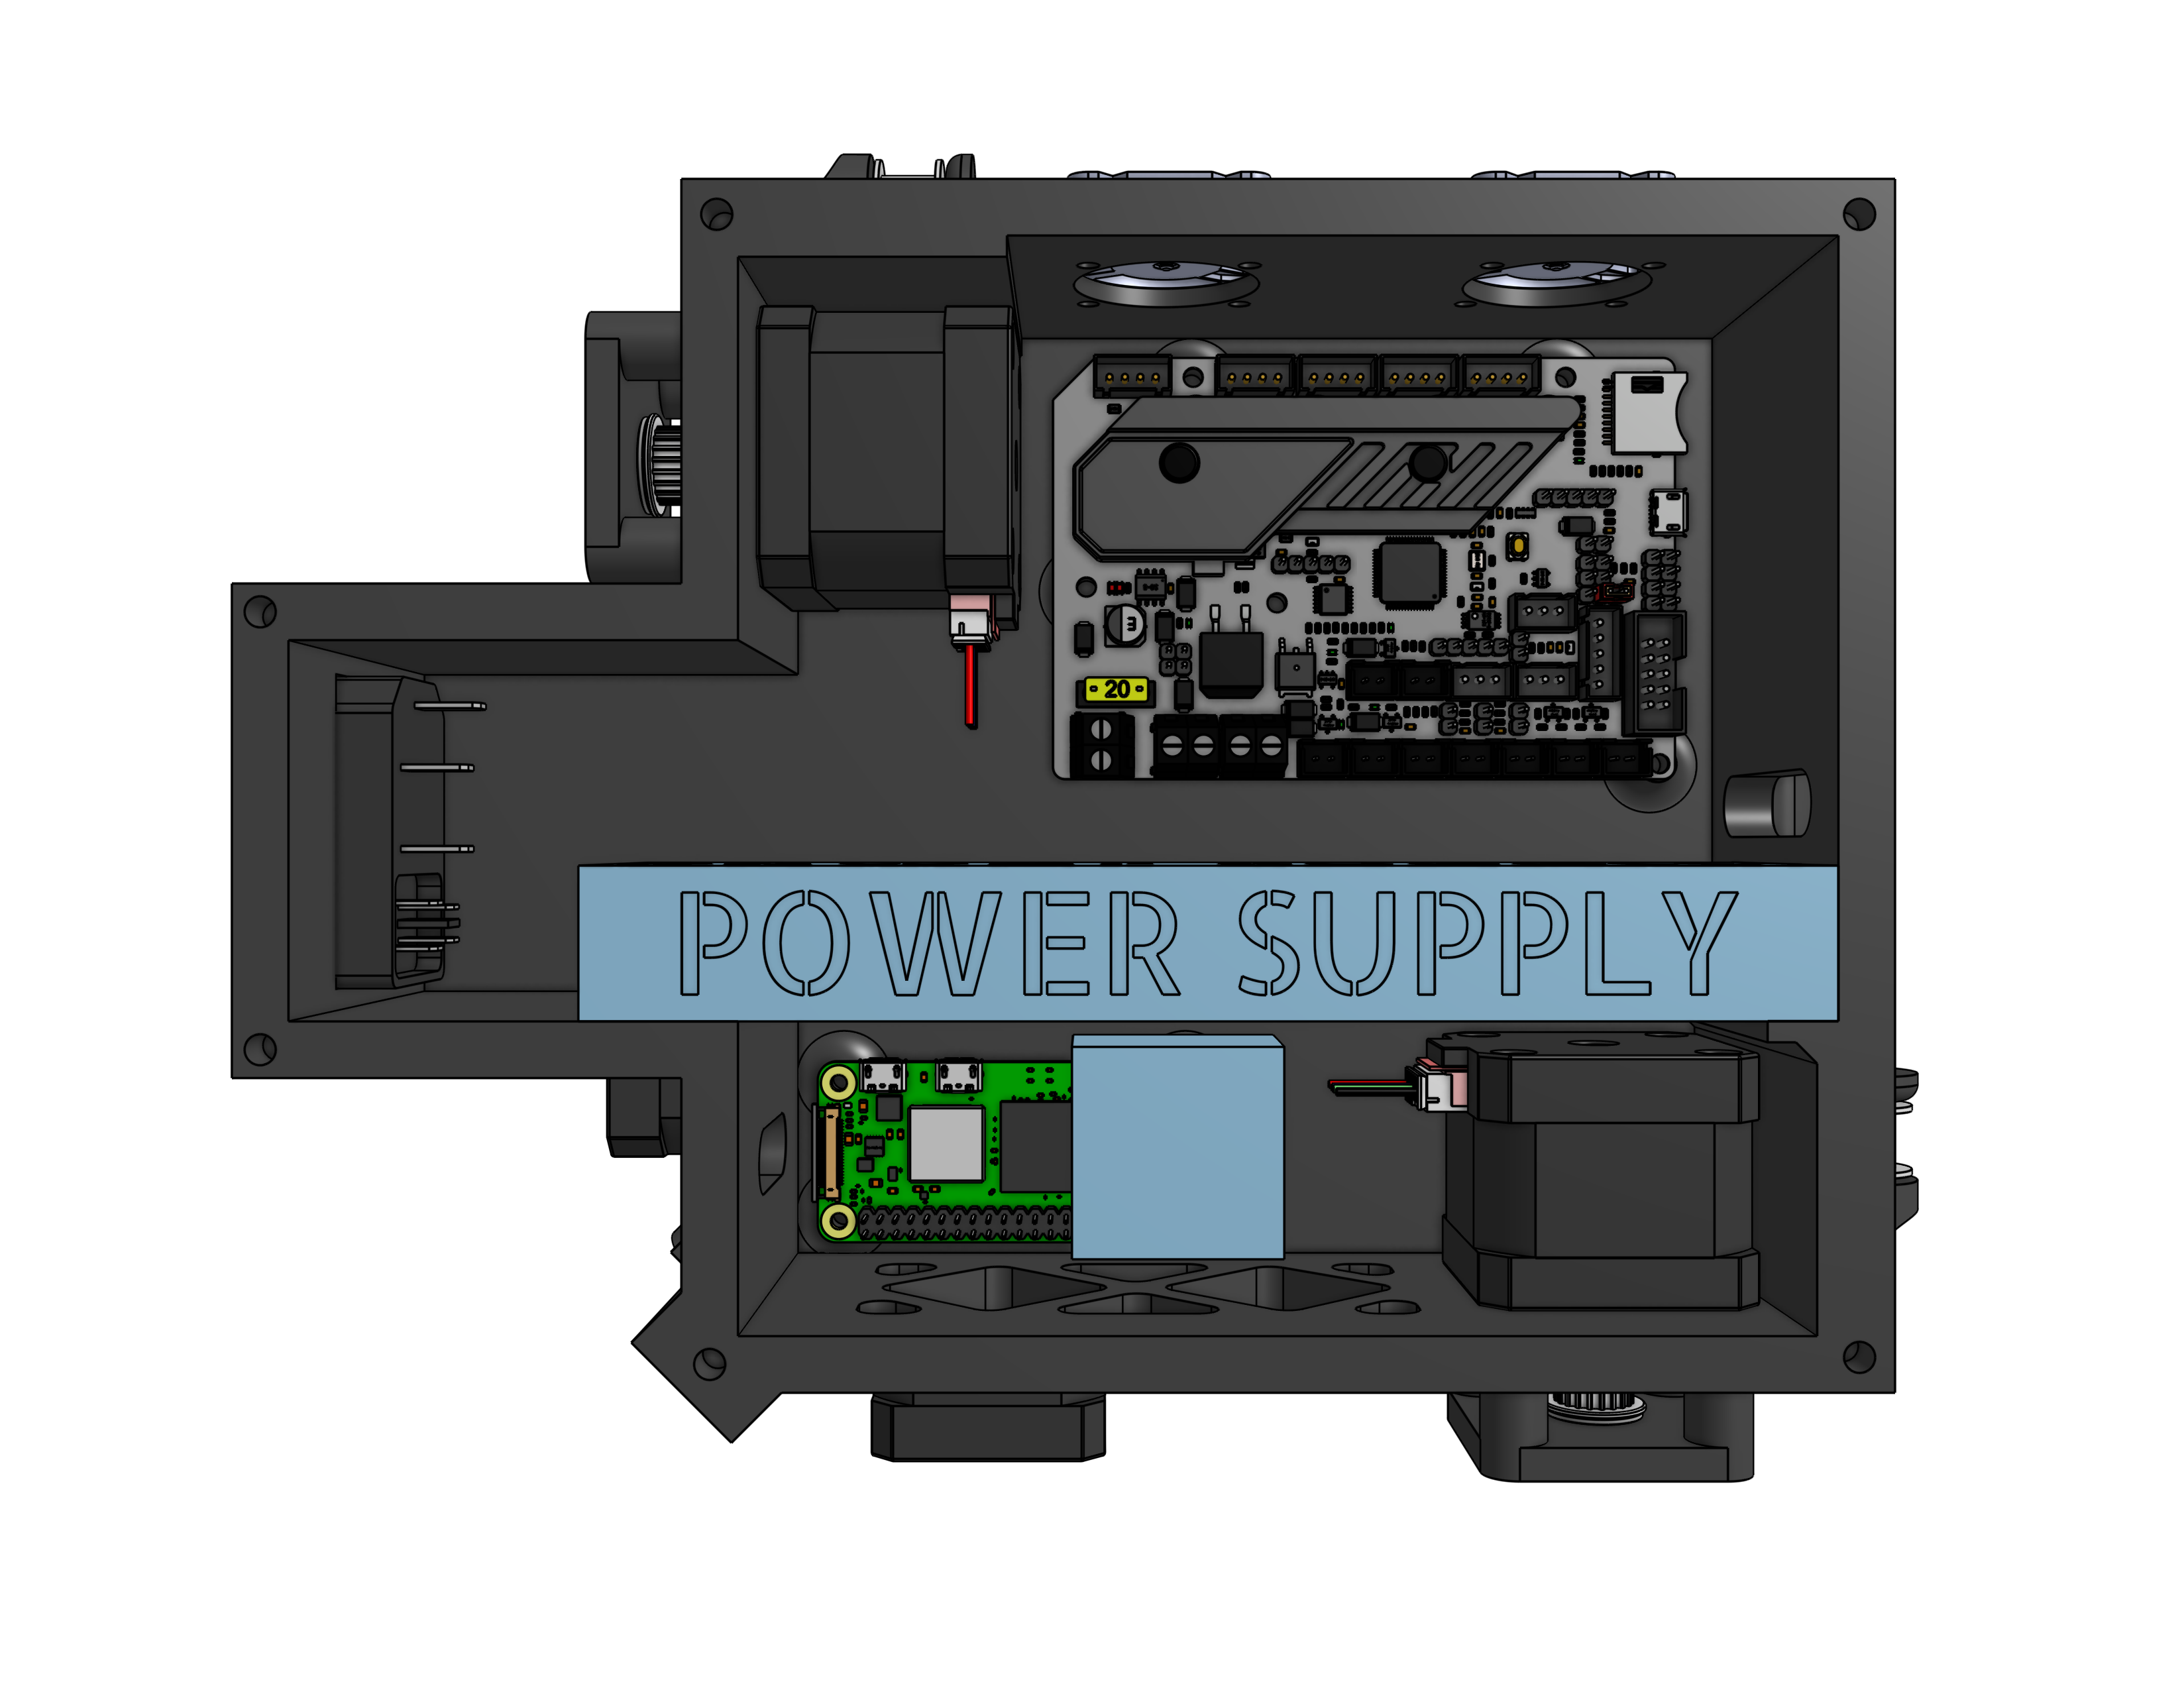
For electronics, I am using an SKR Mini E3V3 control board combined with a Pi 3A for the coprocessor to run Klipper. The SKR Mini E3V3 can drive all of the components needed for this smaller printer, including the 5 stepper motors, fans, and z probe. The Pi is used to run klipper along with a 7” Touchscreen for the interface. There was also a small power supply to convert the 120VAC into 24VDC to power all of the components.
There were also a set of 4010 fans built into the frame on the side to prove cooling for the electronics inside the frame.
Toolhead + Toolchanger Design
Due to the nature of this cross gantry system, I decided to design my own toolhead to fit the space requirements.
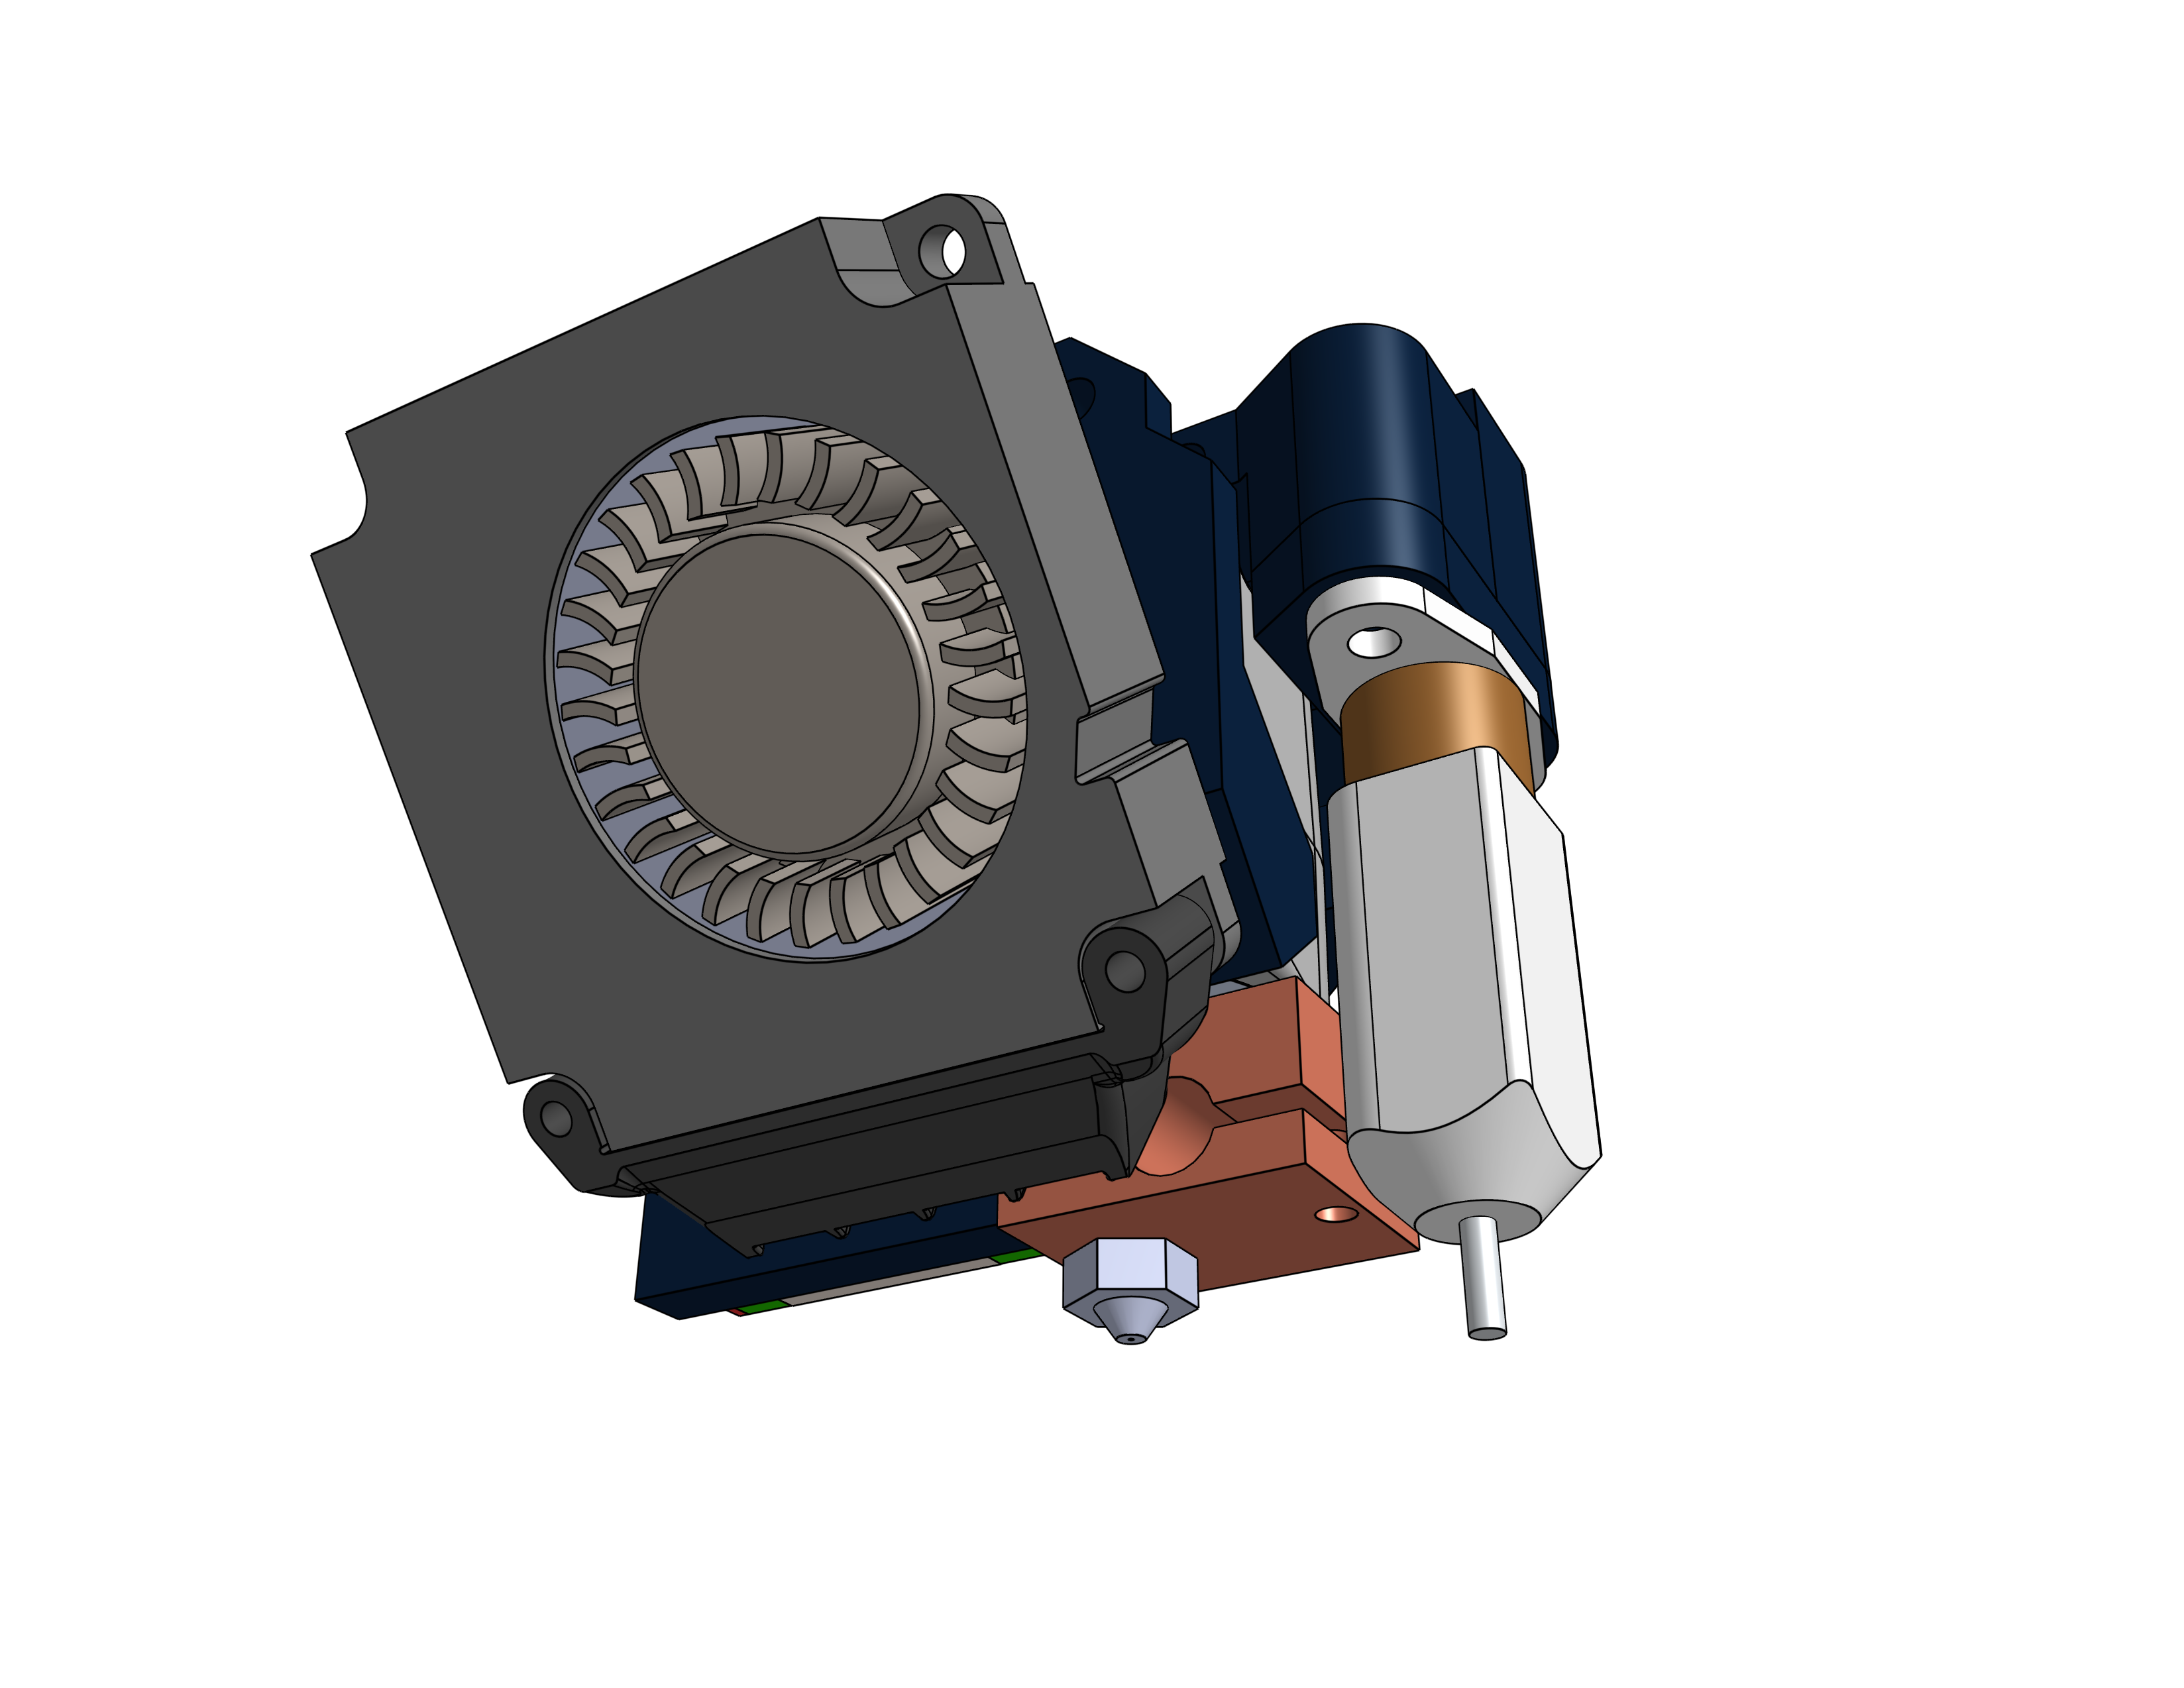
Due to the perpendicular nature of the linear rails in thise cross gantry system, I split the mount into a few parts for easier assembly. I decided to go with a bowden drive with a V6 hotend to minimize weight and difficulty of assembly. The V6 hotend was chosen because it was cheap and very easy to build into a system without needing complicated designs, and the bowden drive was chosen to reduce the amount of weight on the toolhead, as the cantilevered design would perform better with less mass to move.
I also mounted a 4010 blower fan onto the system for part cooling, combined with some ducts in order to direct the airflow onto the part as it prints.
Motion System - X, Y, and Z
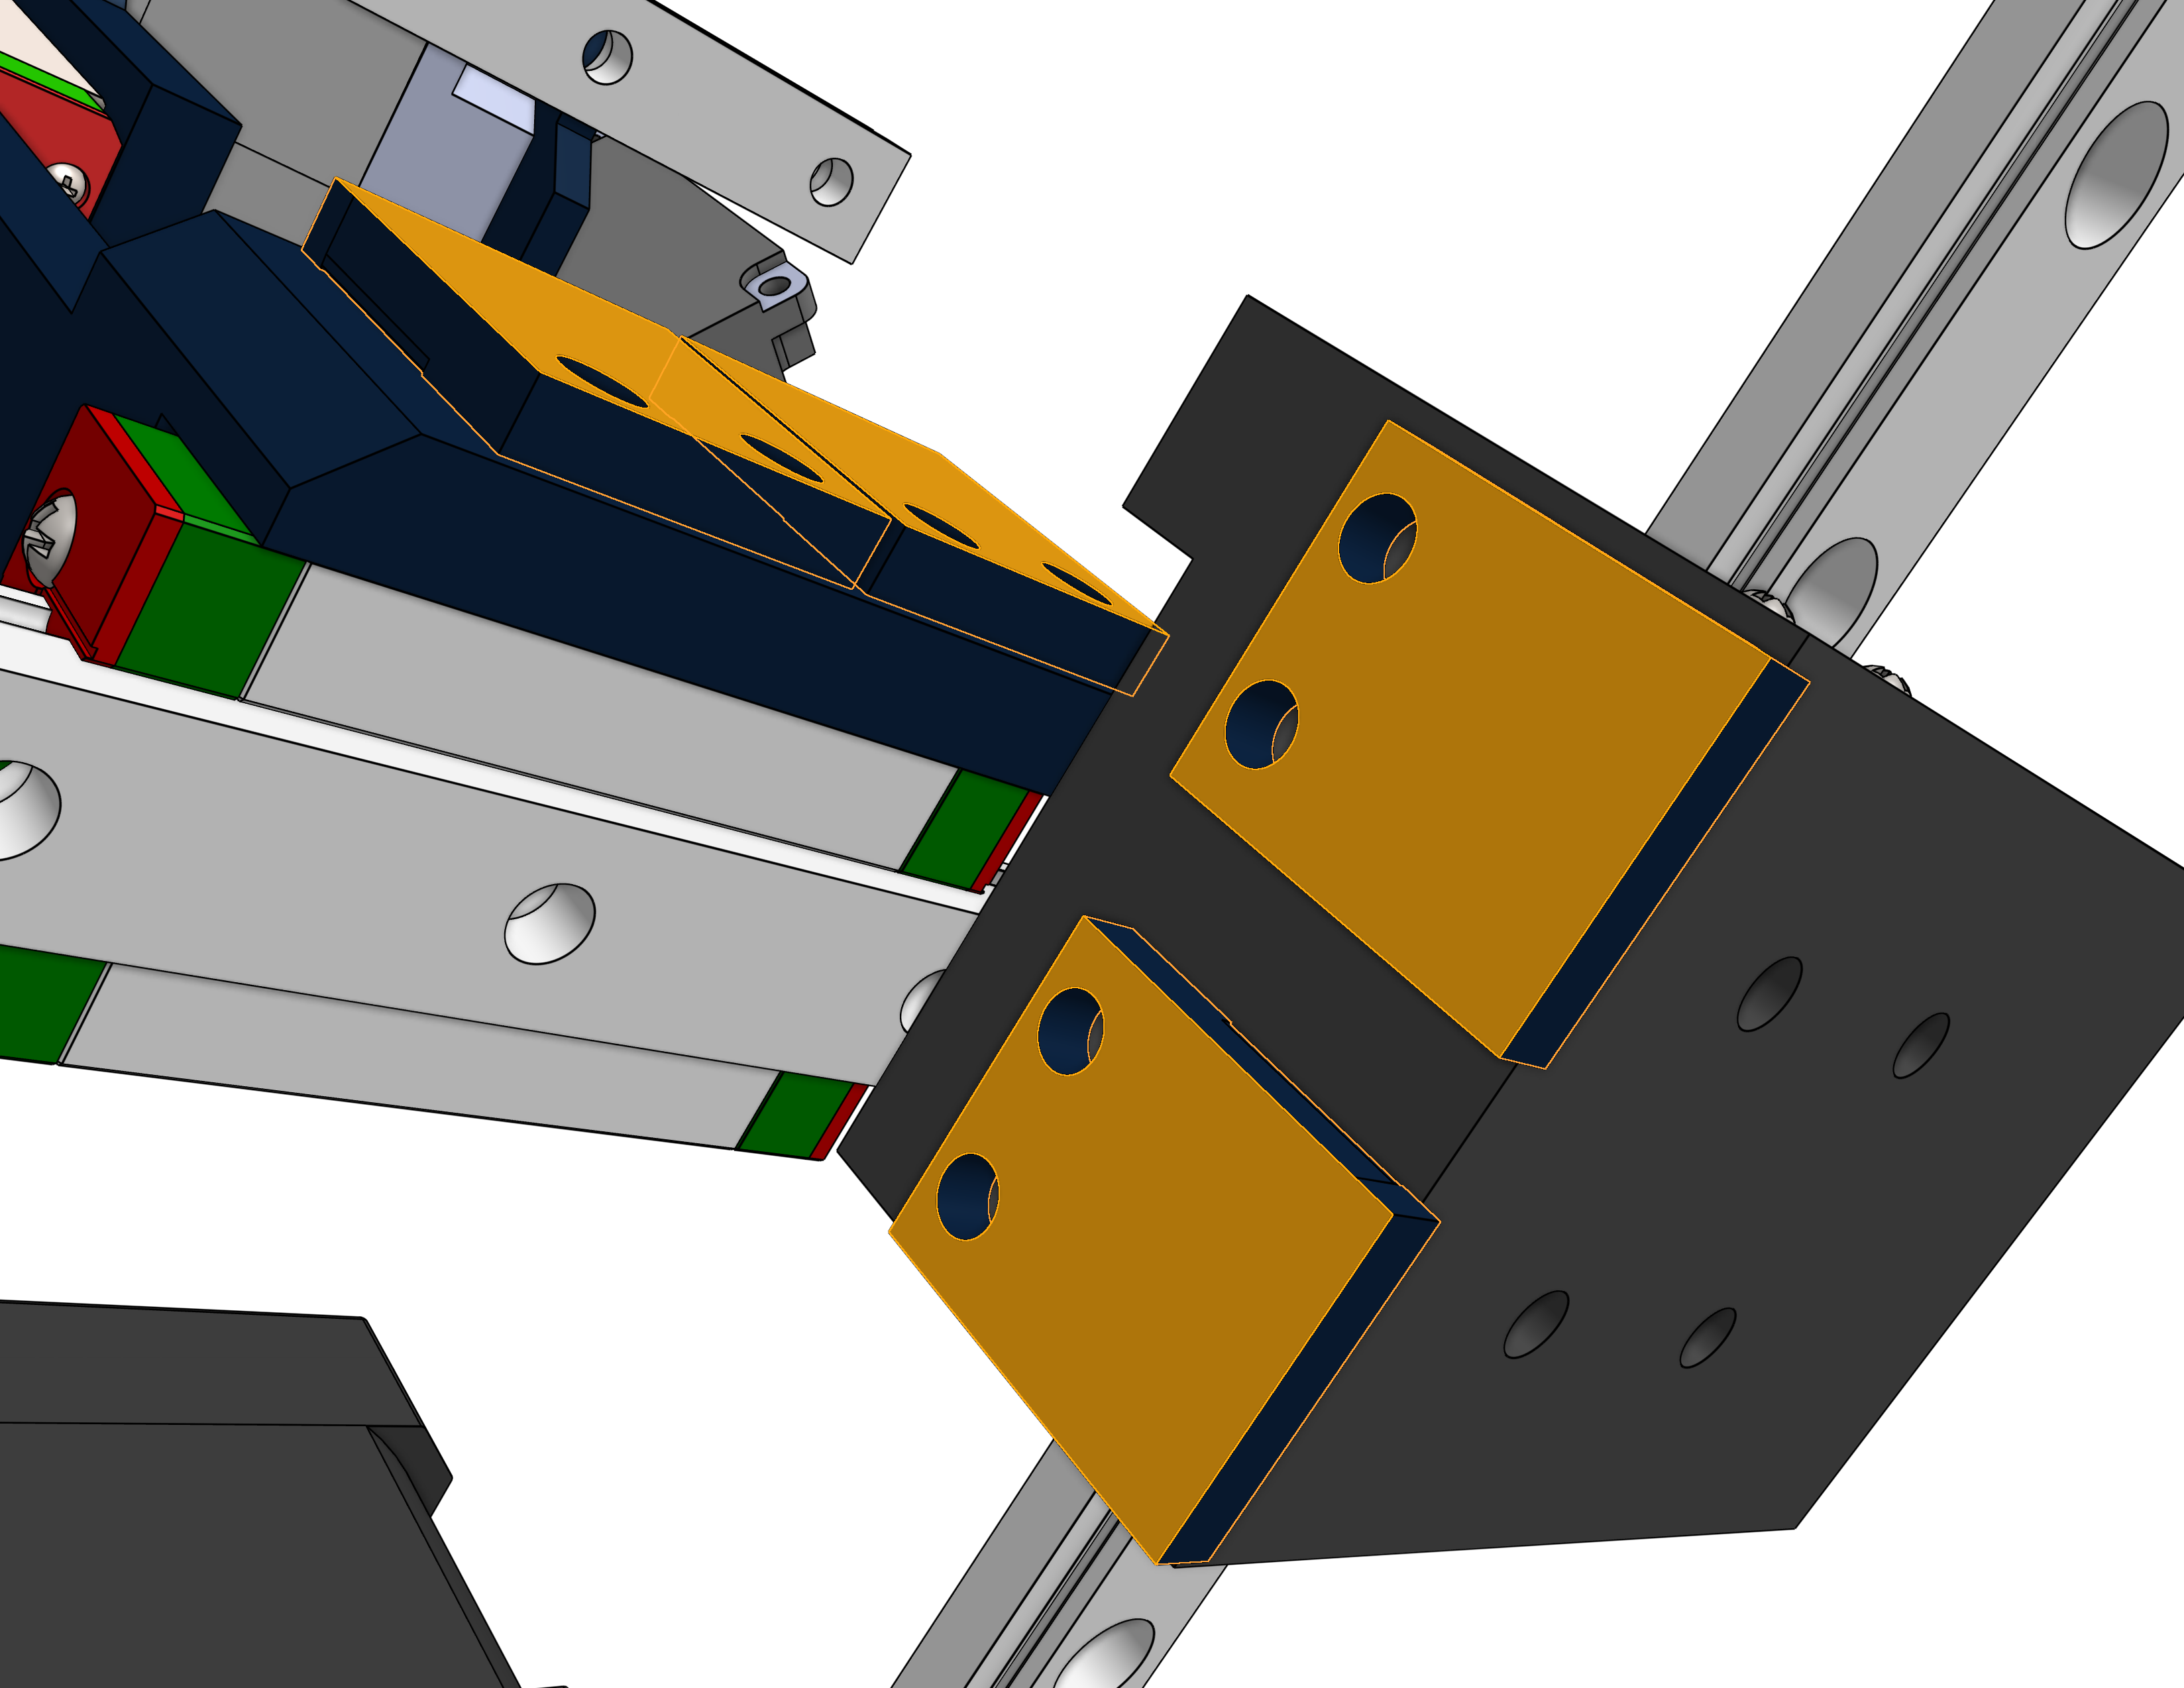
The motion system for X and Y is a Cross Gantry system, where the linear rails or rods cross over each other for increased stability and strength, allowing for faster speeds overall. The Z motion system was 2 motors with a belted Z setup, allowing for even z movement. The X and Y system also used belts, all of which were GT2. I used MGN9C linear rails and carriages for everything. The belt paths are drawn out below
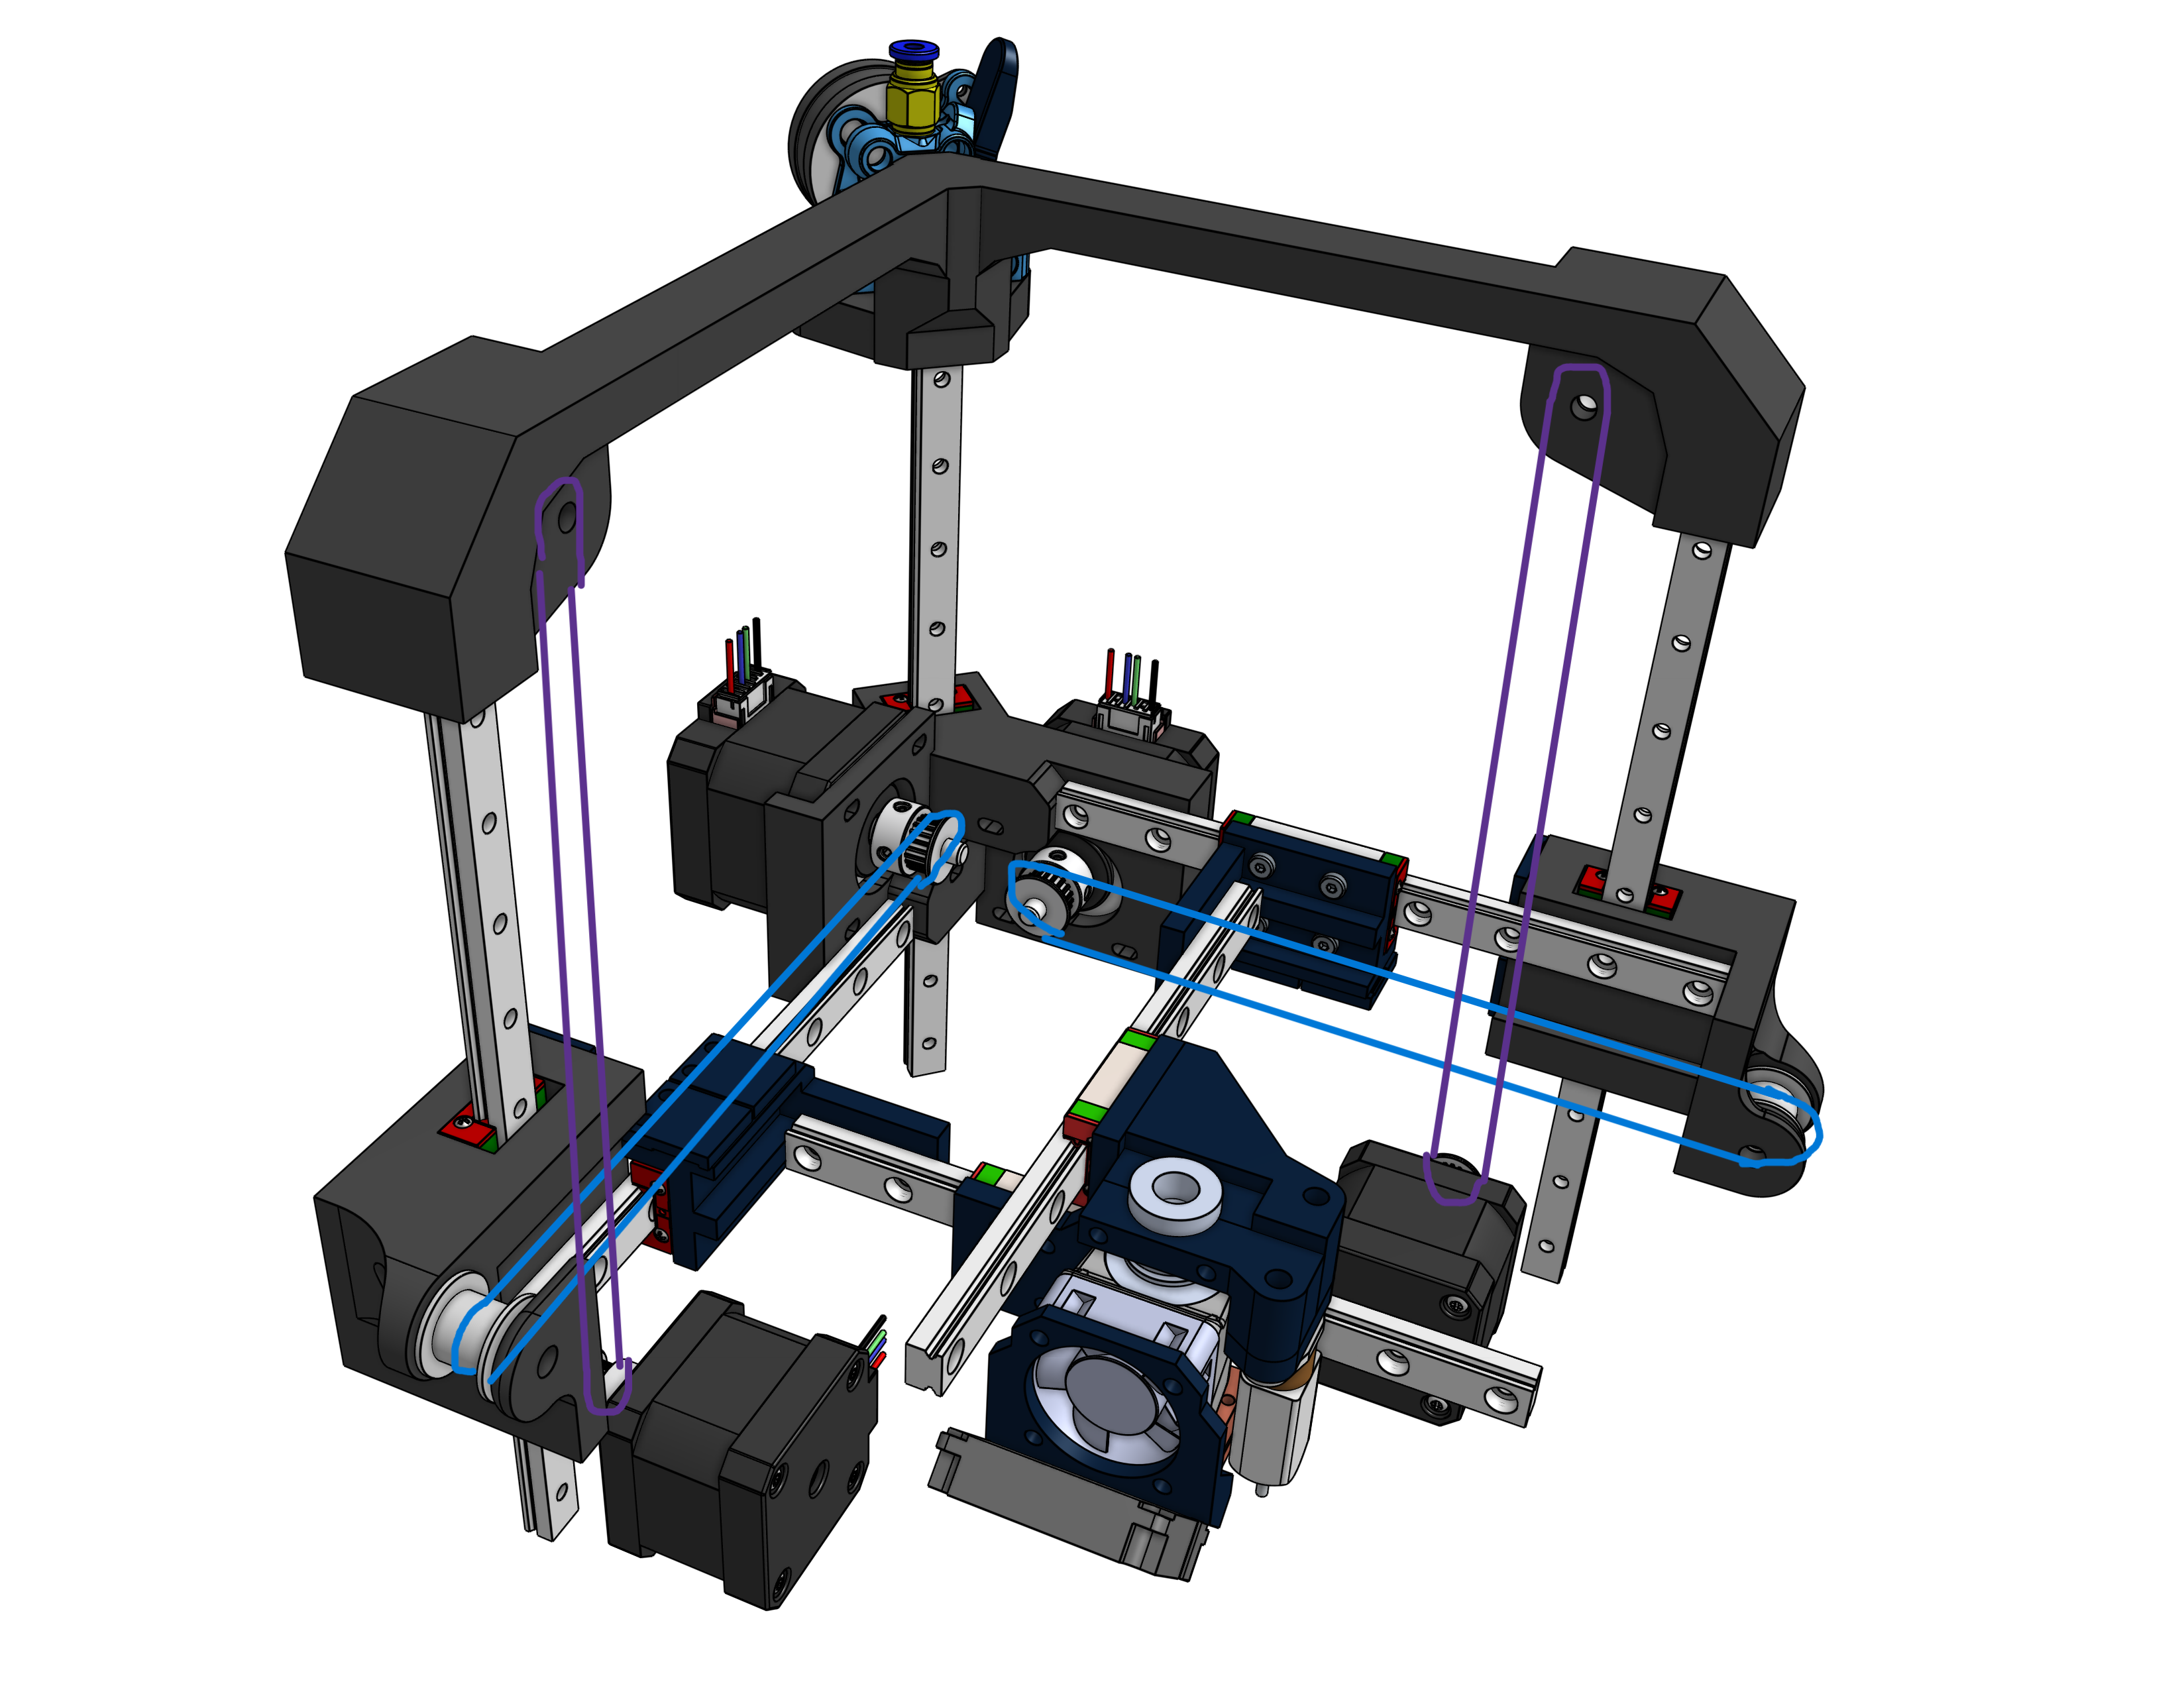
I added a third z linear rail for better stability and to have a spot for the motor mounts. The motors for the X and Y motion, along with the extruder all mount to this big mount here. Additionally, on the two powered z mounts that interface with the linear rails and z belts, there is a mount for the XY belt train to follow.

Firmware
The firmware used on CCMini was a fork of Klipper called Kalico, formerly known as Danger Klipper. I made a custom profile in order to have better control over my system.