Amethyst
A fully custom mechanical keyboard, designed from scratch with KiCad and Onshape
Skills
Project Overview
Amethyst is my first custom mechanical keyboard that was designed and built in order to learn PCB design and practice my soldering skills.
Design Overview
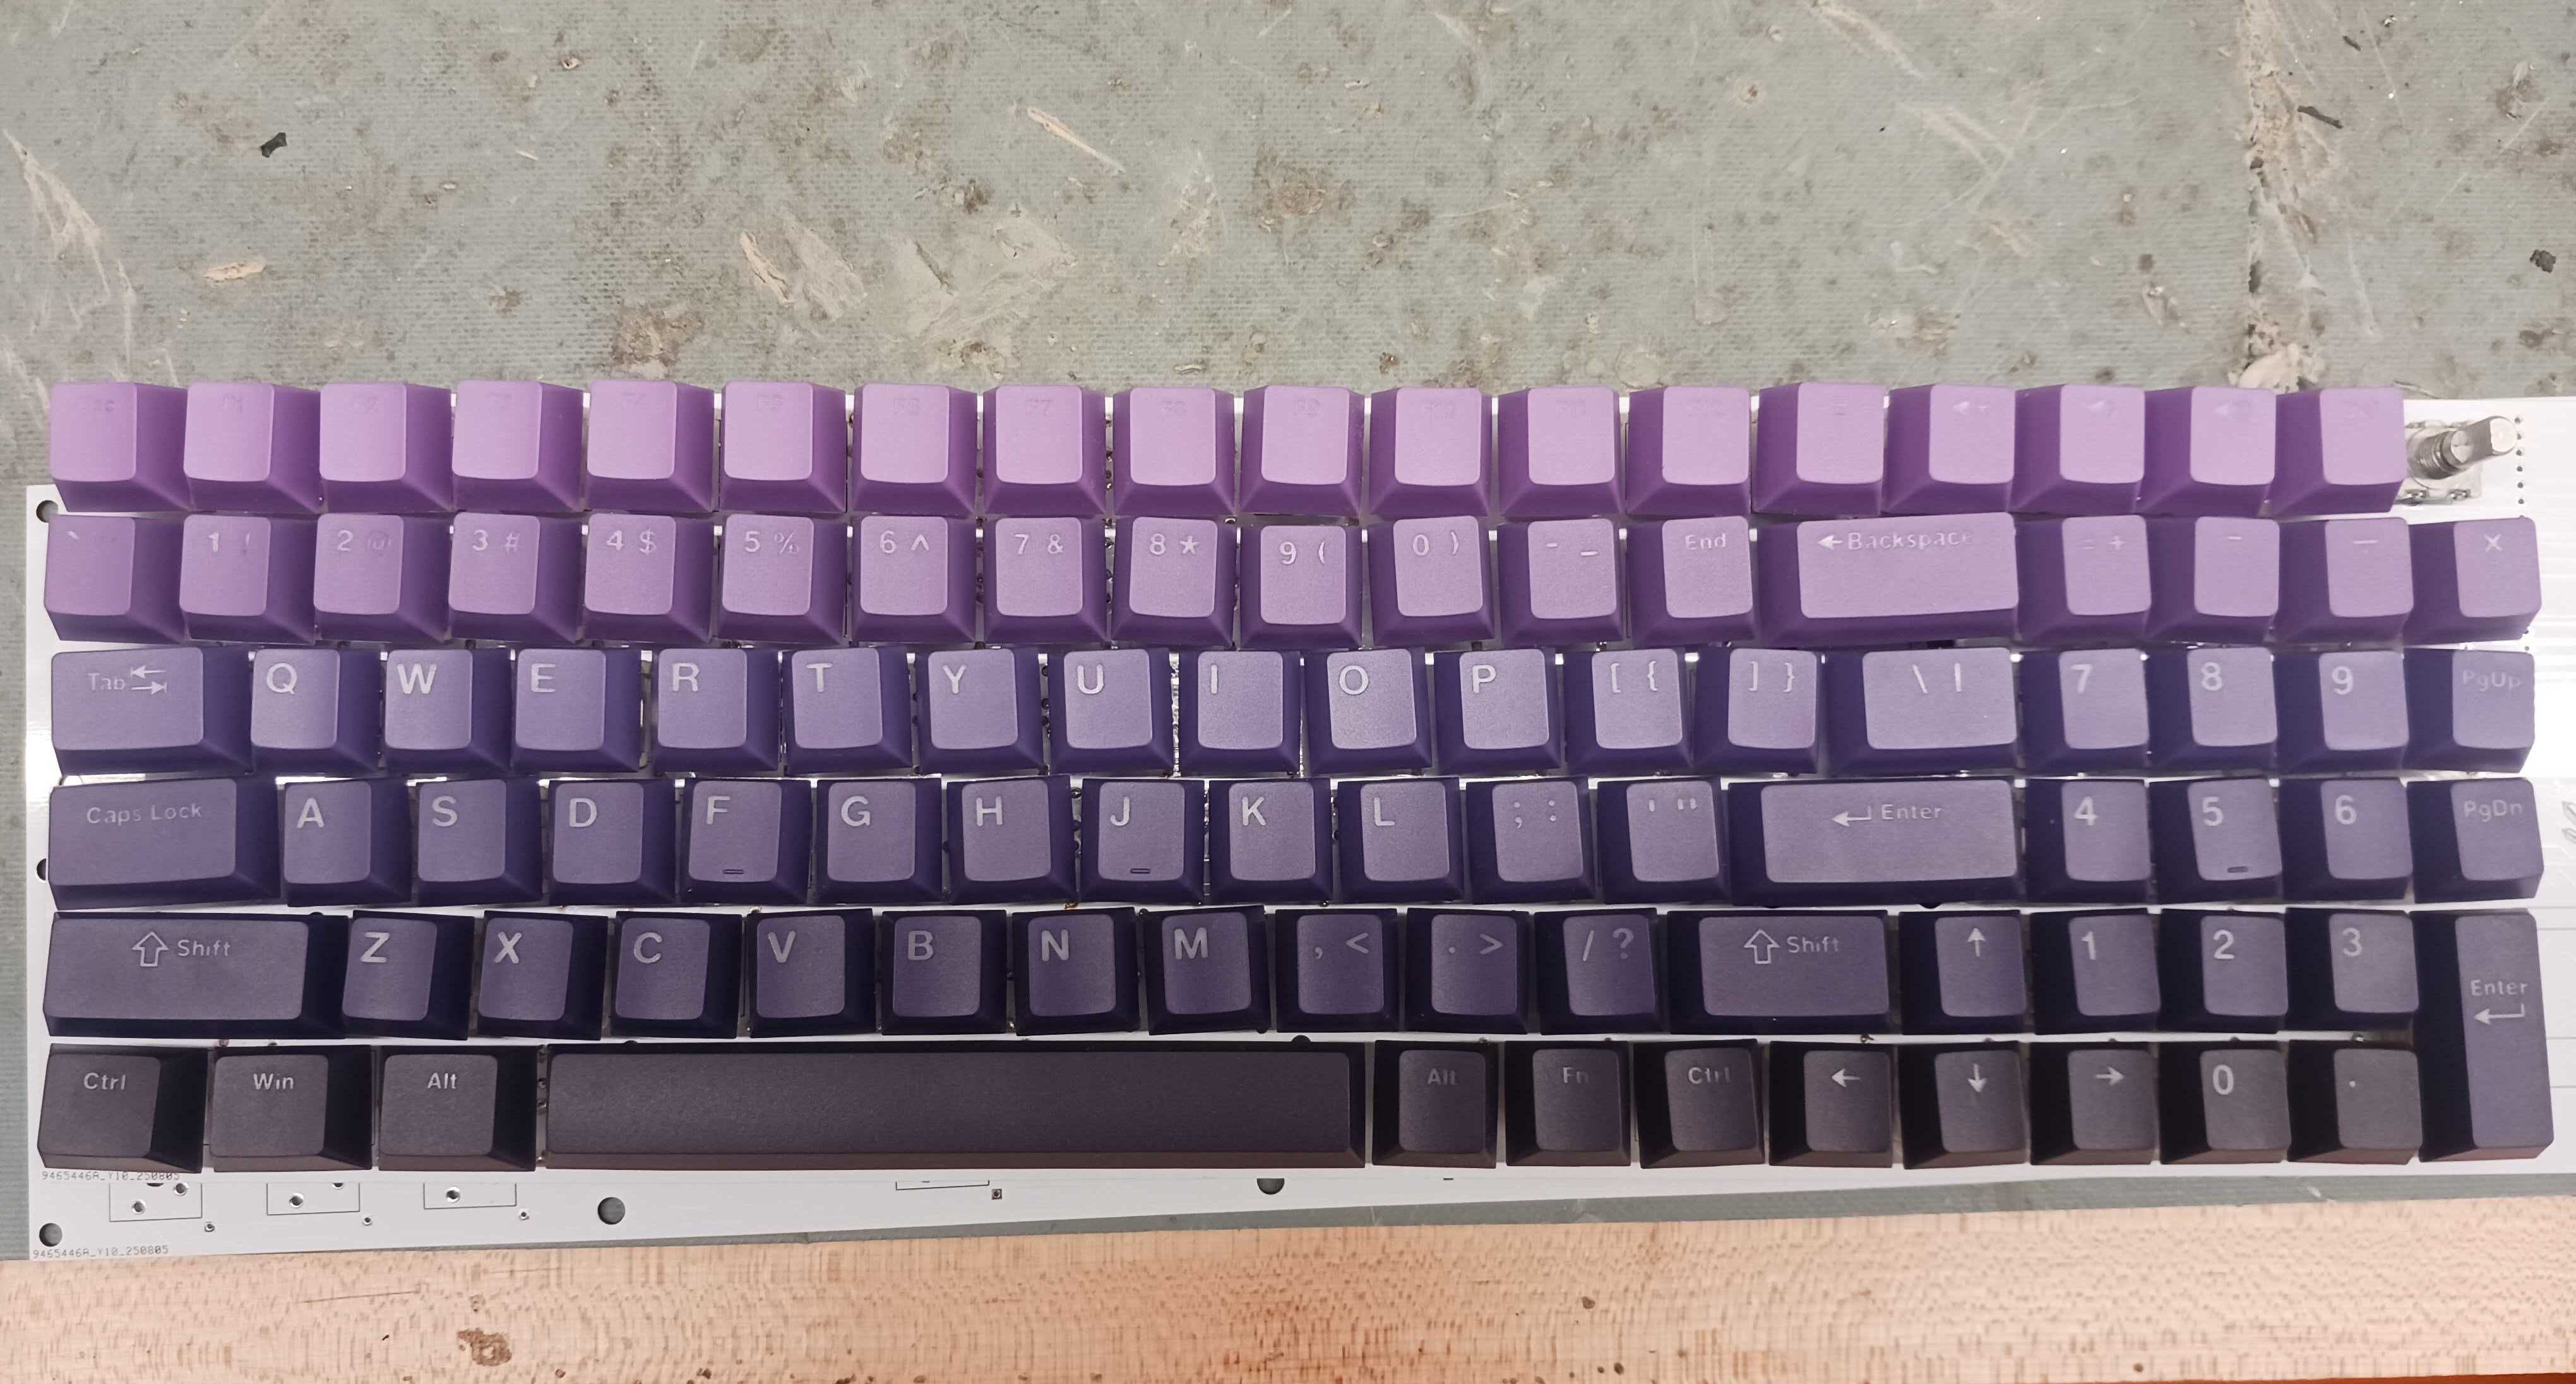
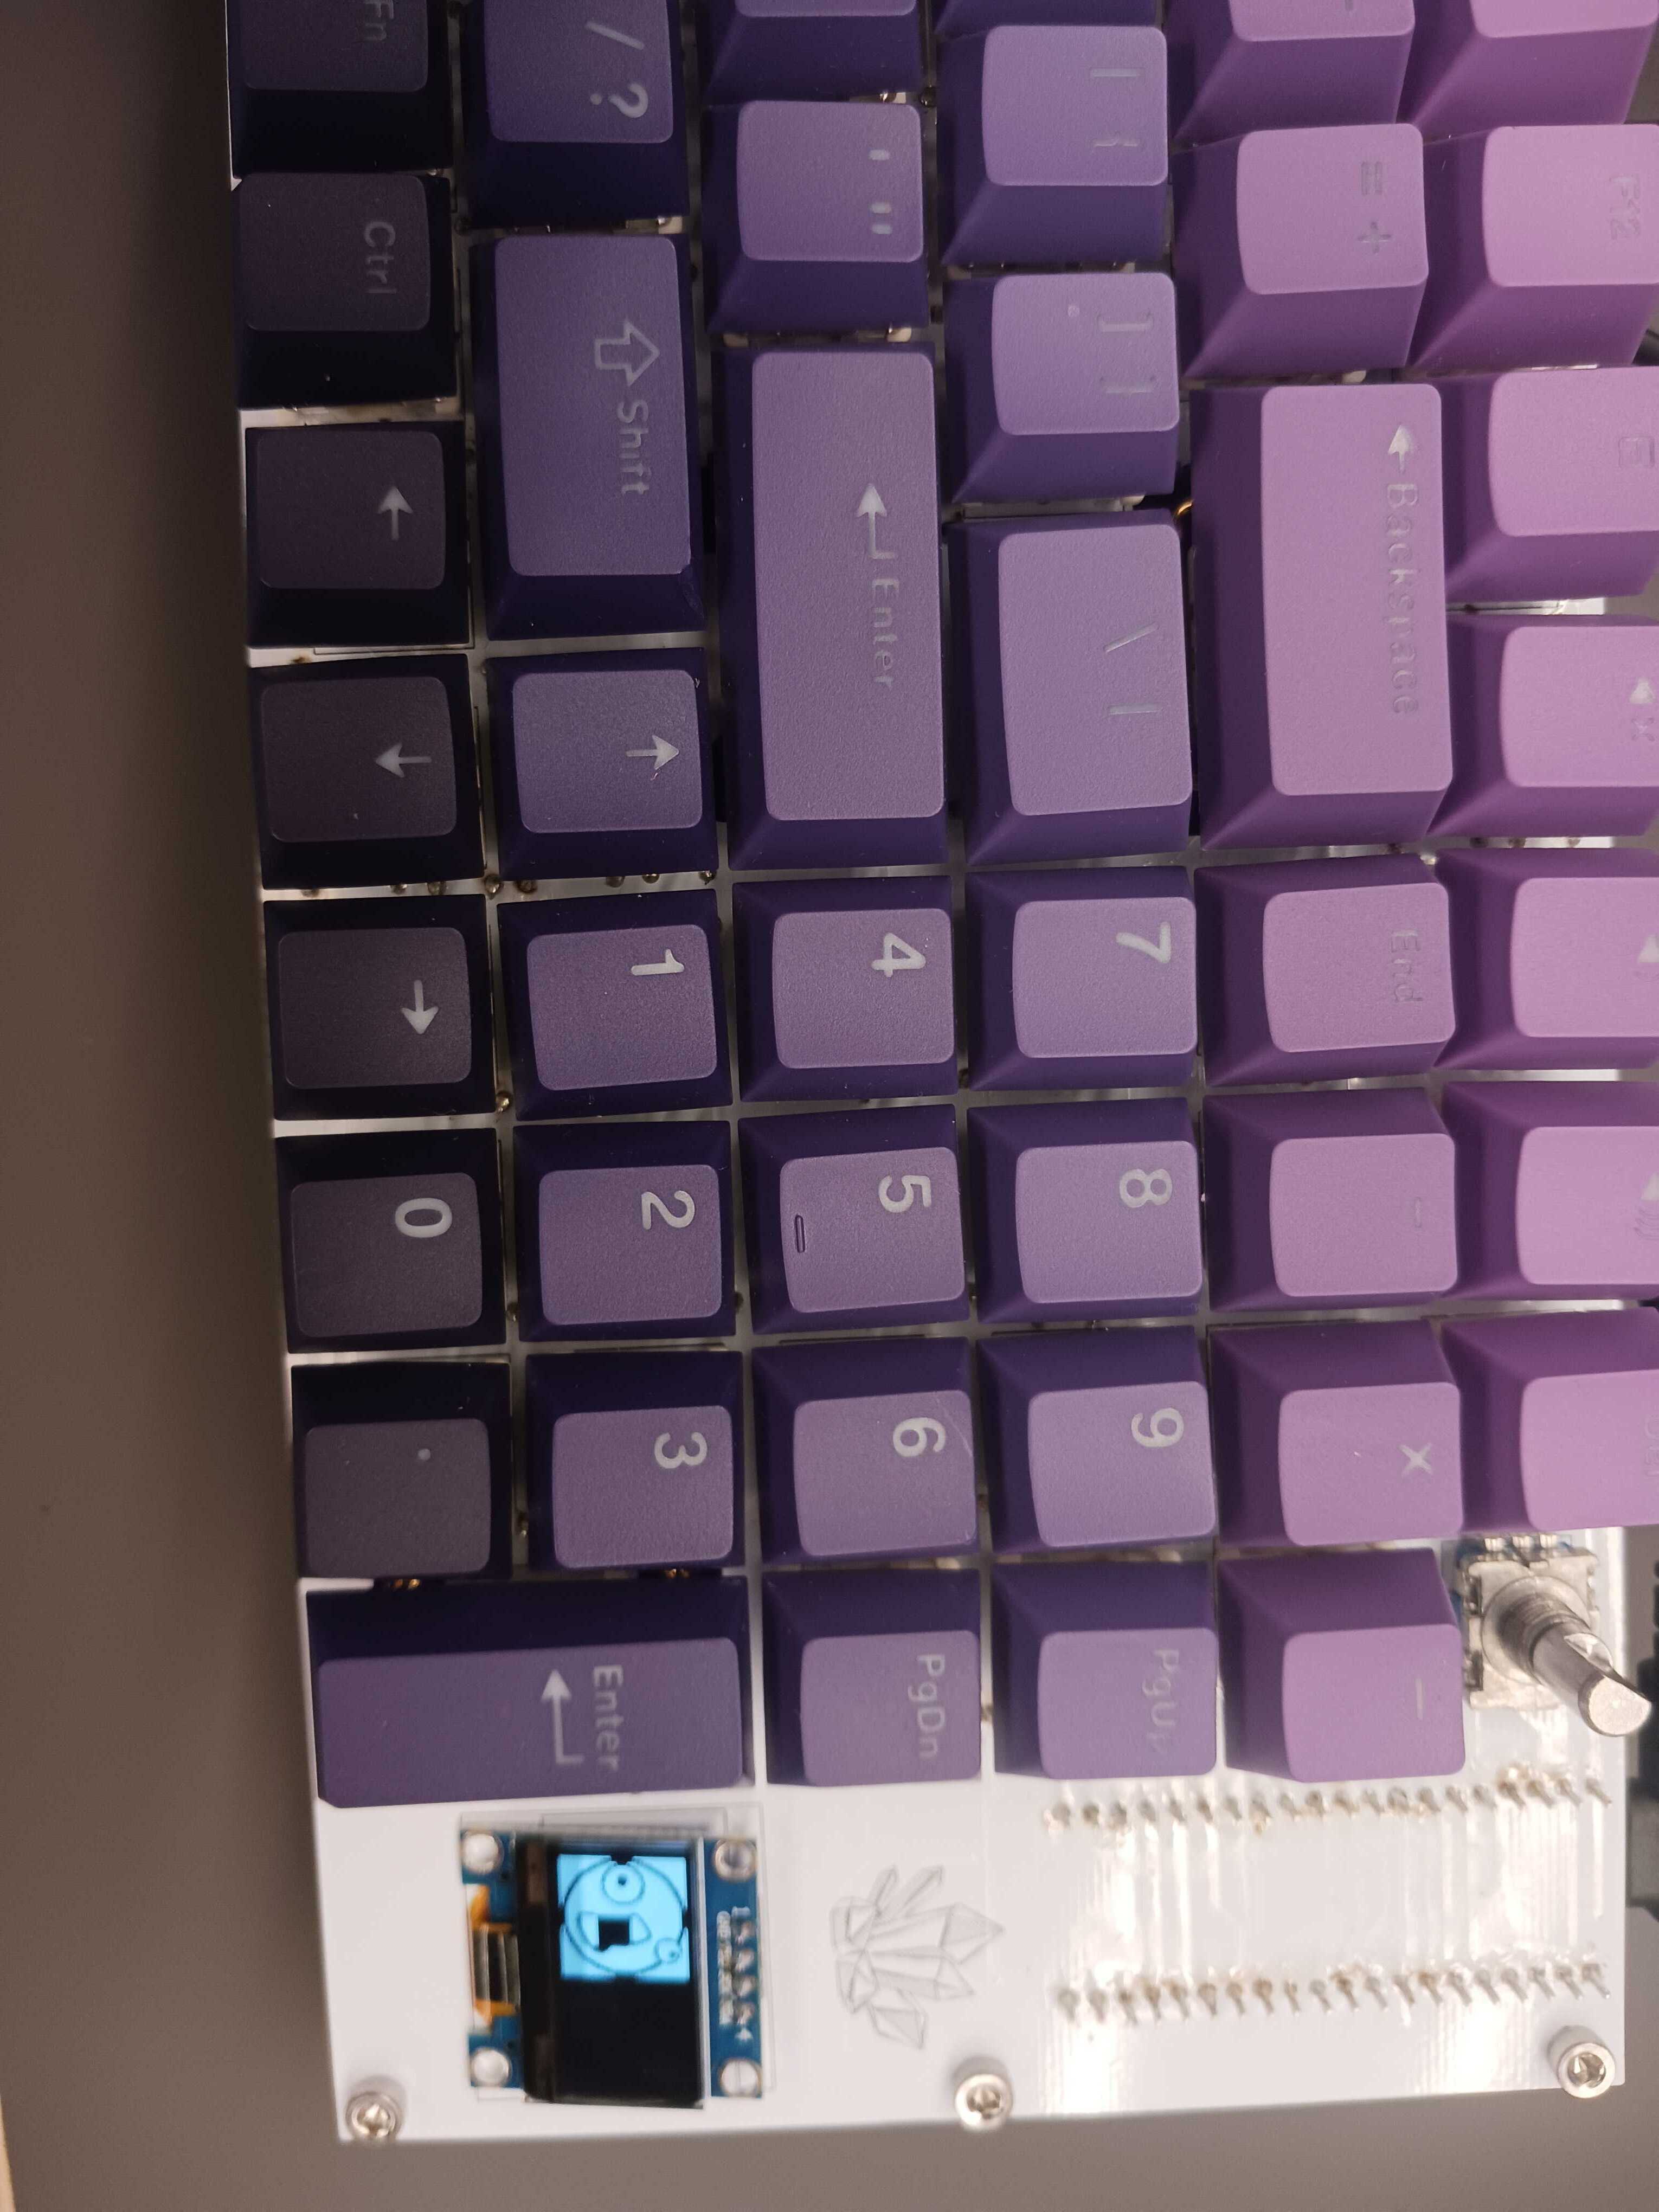
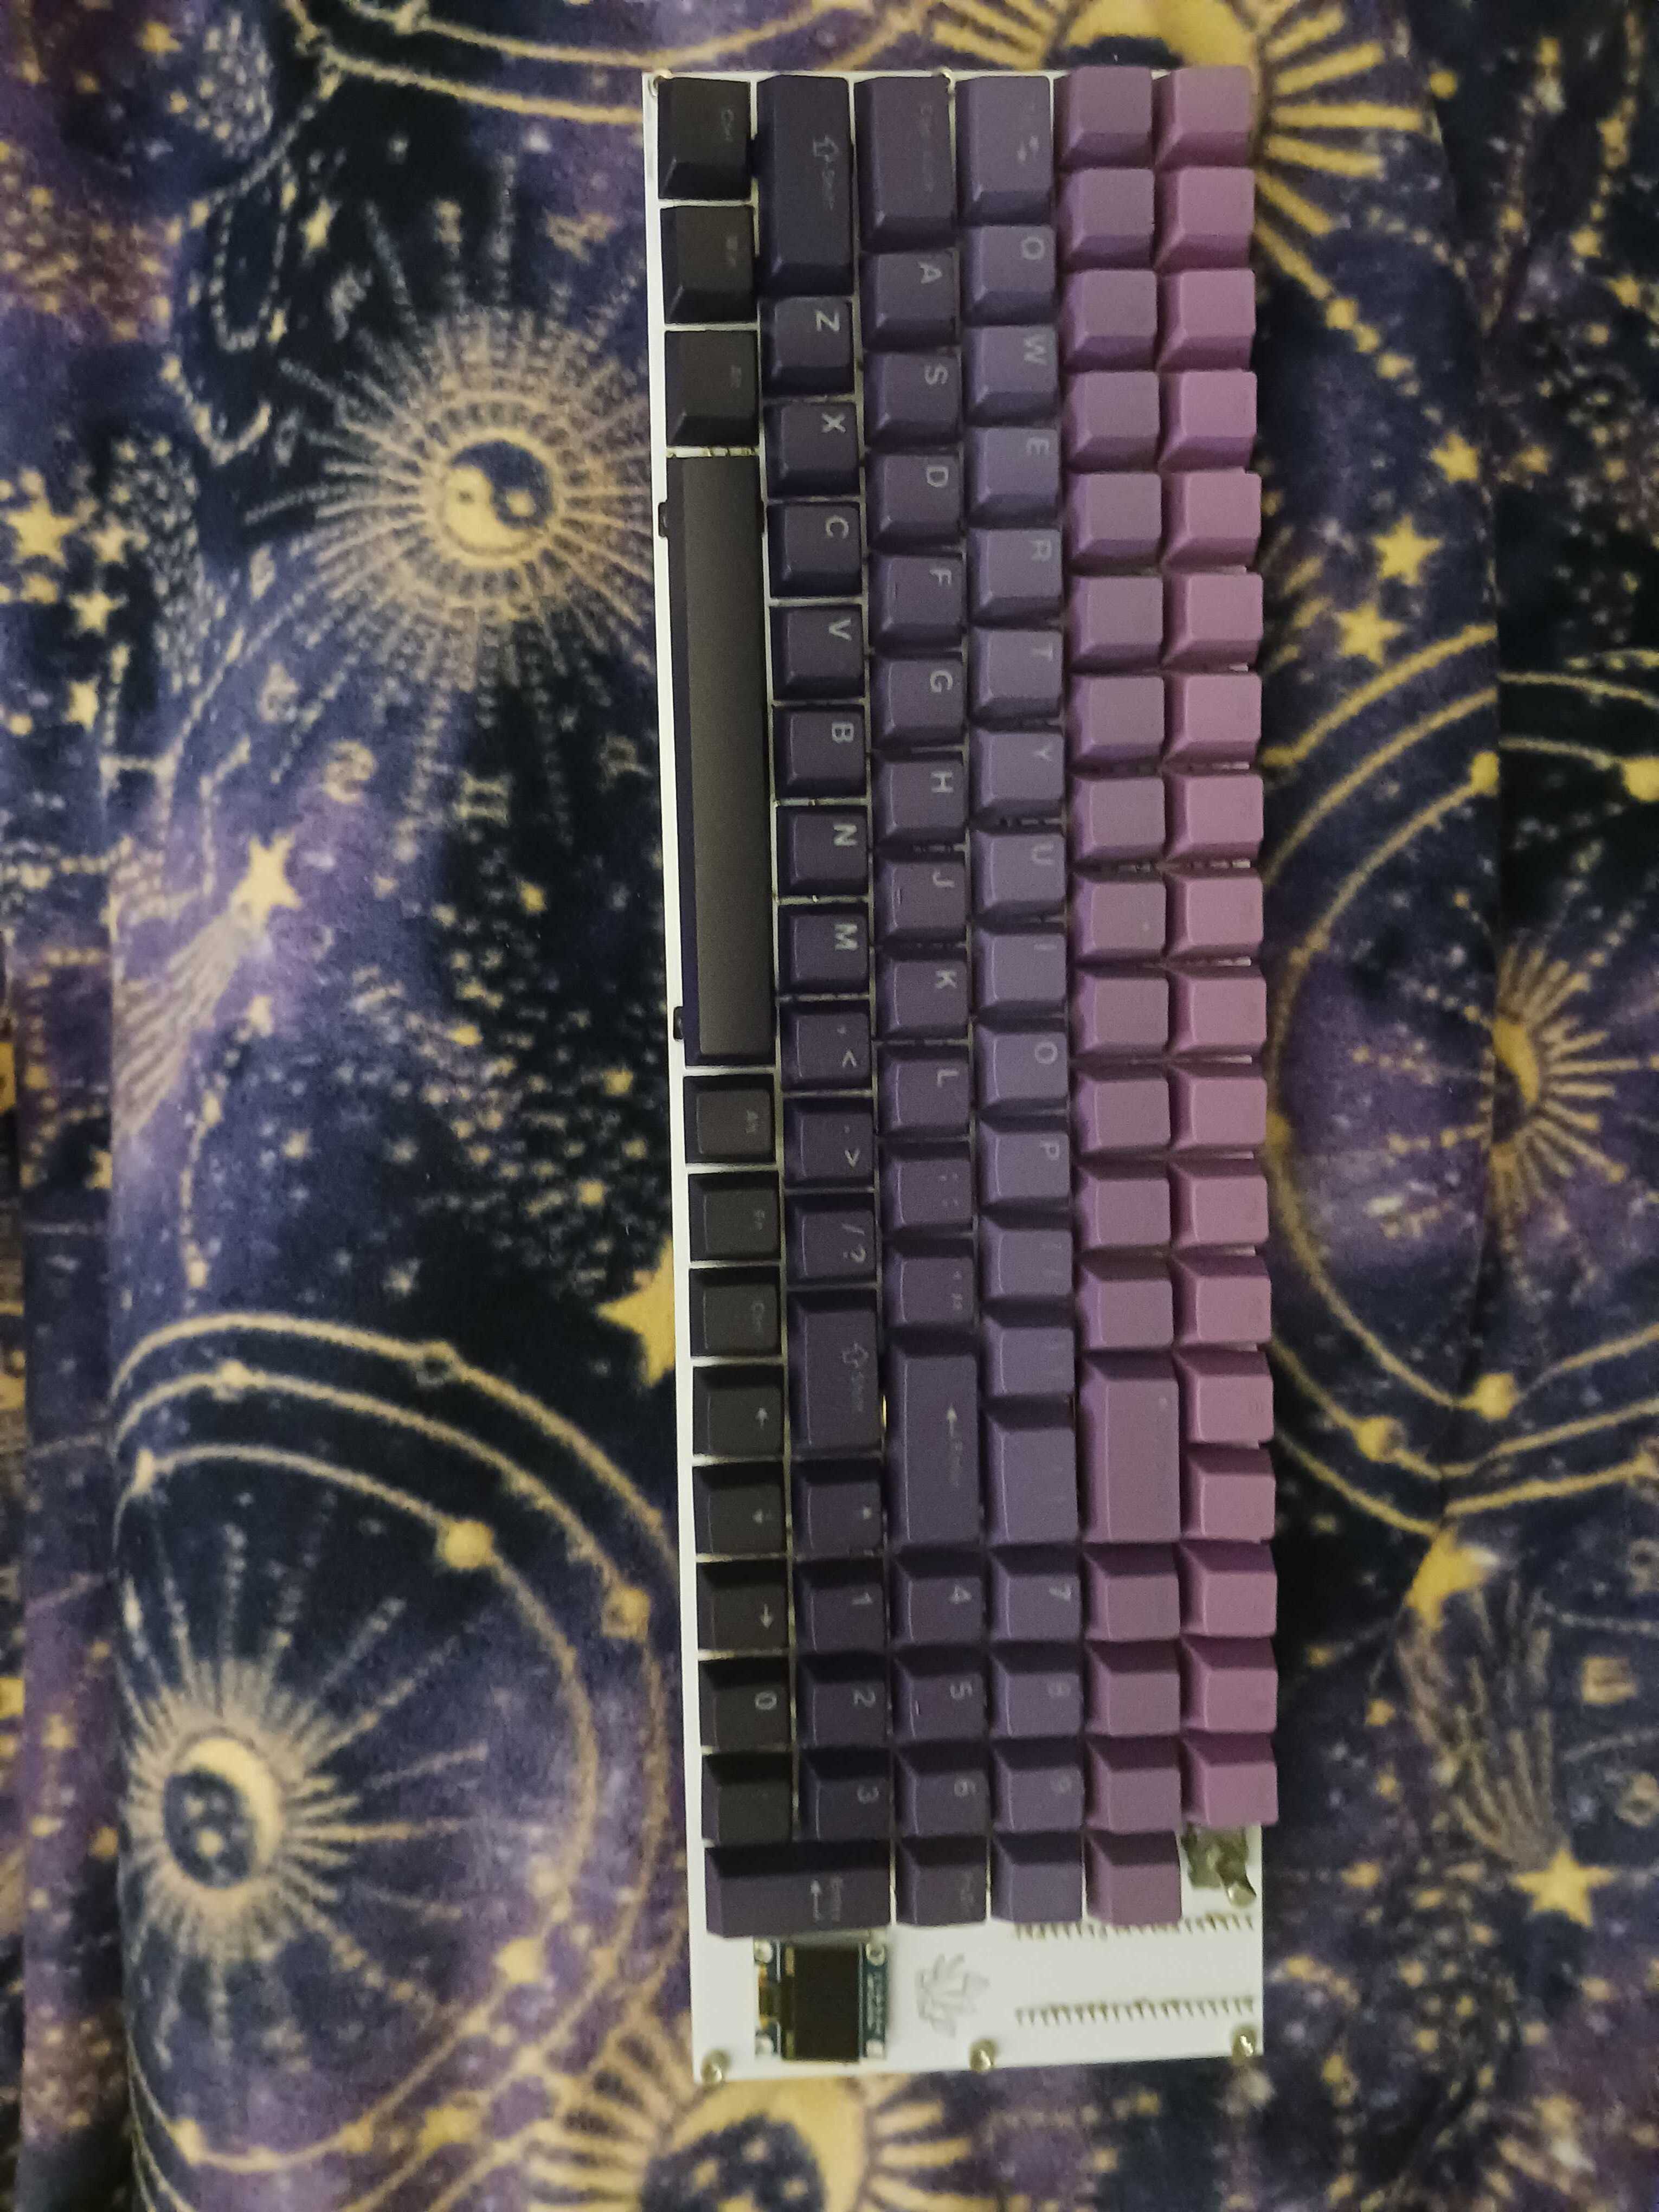
Designed fully in Onshape and KiCad, this 100 key keyboard comes with a dial, numpad, and small programmable LCD screen. Amethyst is named this way due to the combination of its purple keycaps and case, and white PCB.
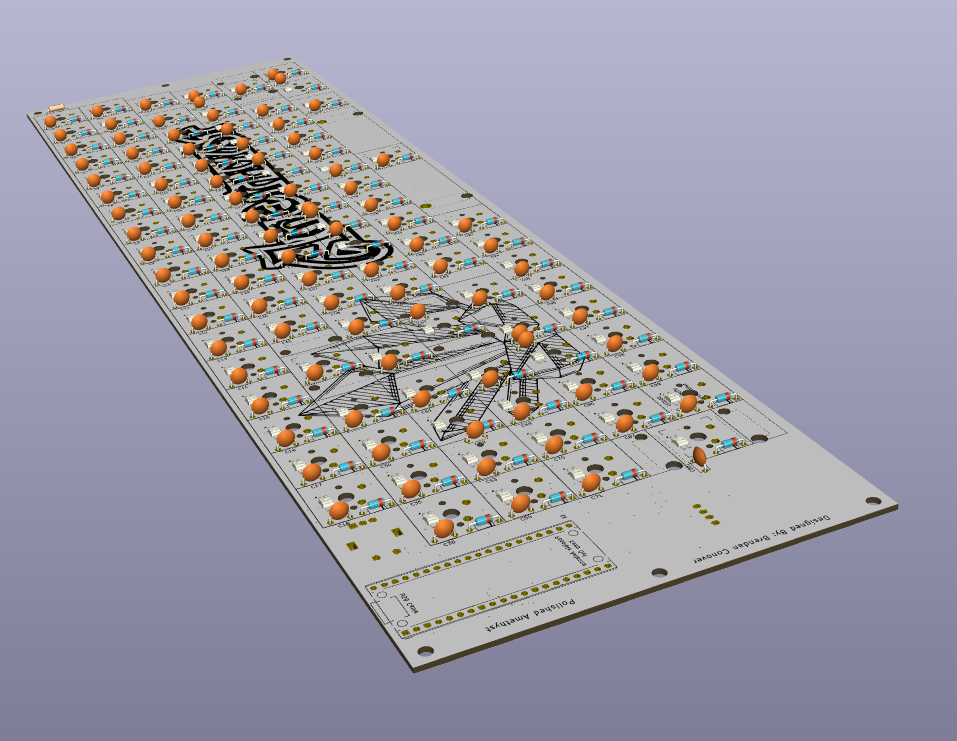
PCB Design
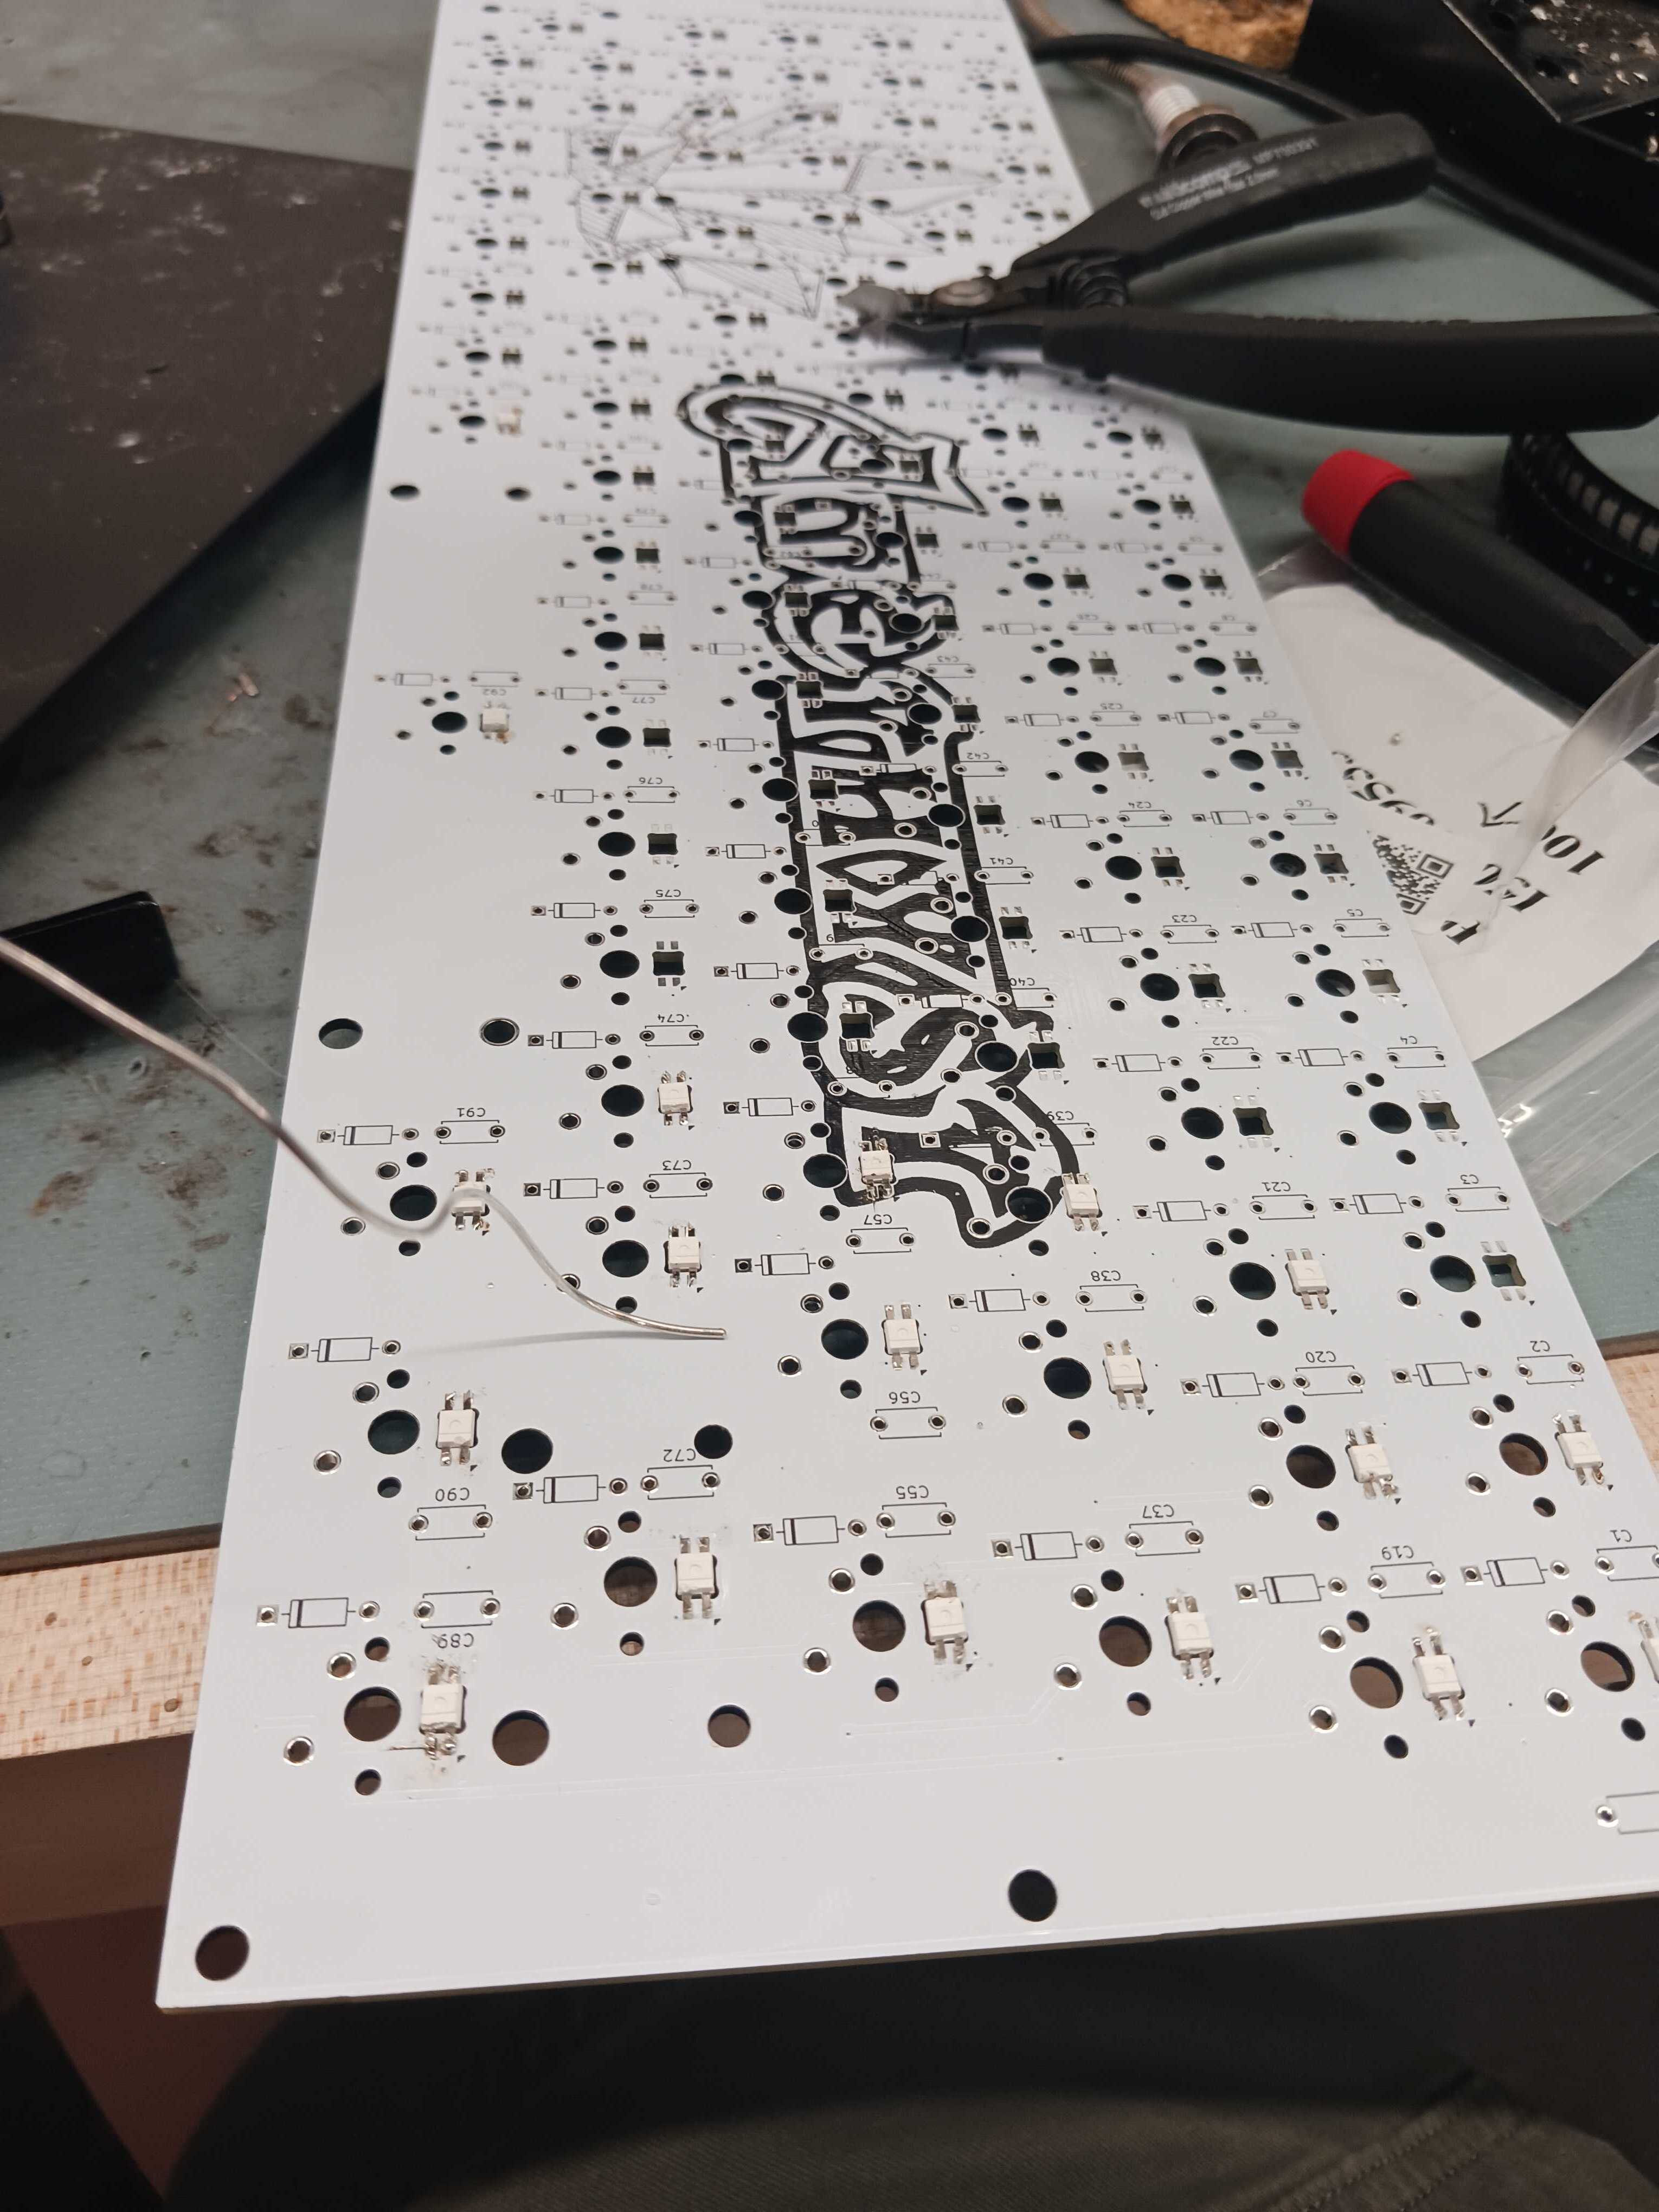
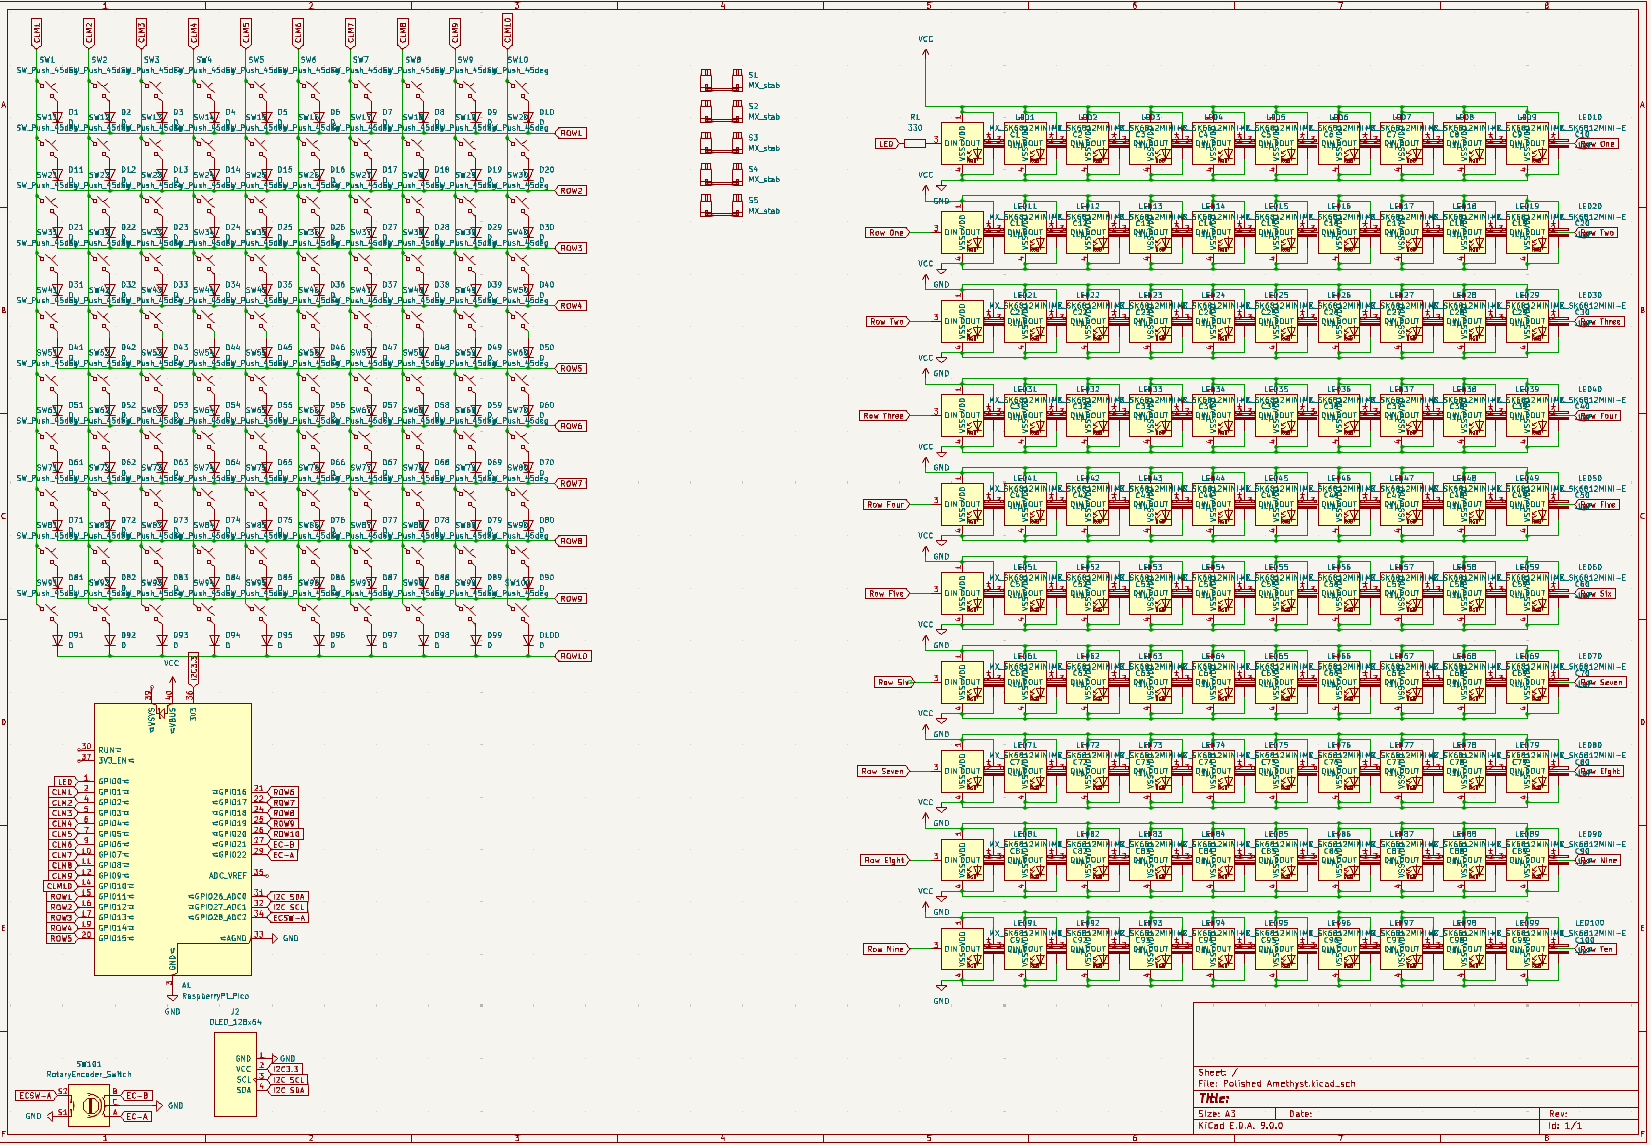
I designed the schematic, placed the footprints, and routed the traces for this PCB fully in KiCad. This was my first PCB design project so I taught myself how to do everything.
I decided to use a Pi Pico for the keyboard controller, as I have extensive experience with the Raspberry Pi ecosystem. I found standard key footprints online, and after some research decided on a matrix formation for my keys, requiring only 20 pins on the pico. I also determined that I needed a diode per key, and a capacitor per key to eliminate bounceback within the key, which would lead to false or double inputs. I also wanted to add a rotary encoder for a knob and a little LCD screen, along with backlit LEDs. However, as will be seen later, since I did not add a seperate battery for the LEDs, the power draw they wanted was too great for what the Pi Pico could provide, and thus they did not work.
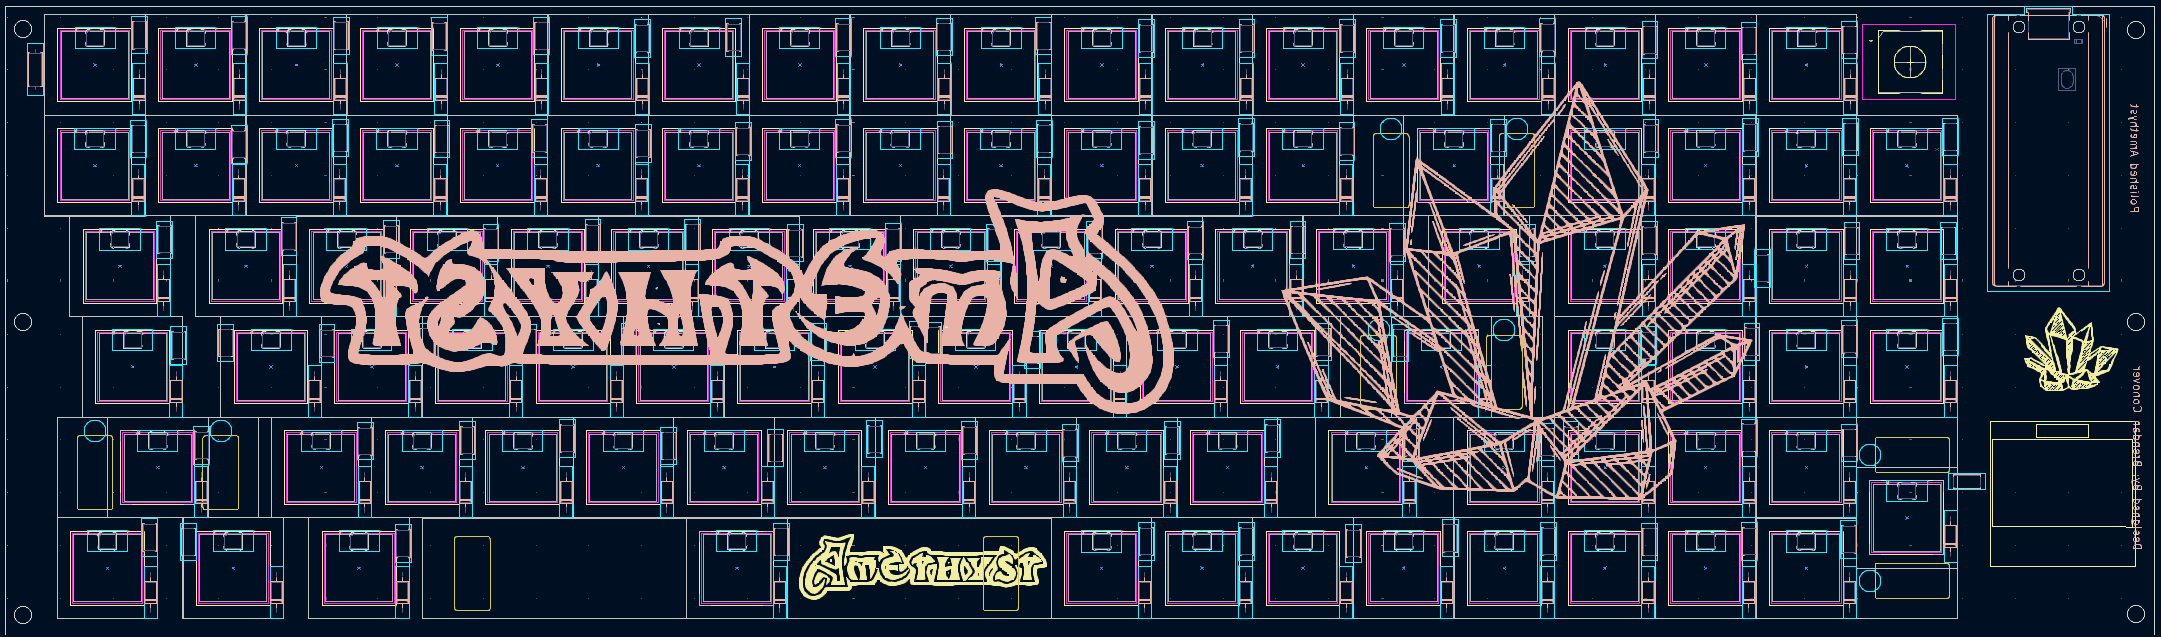
After I finished and checked my schematic, I moved on to laying out my components. In the PCB editor, I aligned all 300+ components exactly how I wanted it to be on the final product.
After the footprints were layed out, I had to start routing the design. I started by defining my outer edges and mounting holes. After some more research, I decided to implement a ground fill on one of my layers in order to make grounding all of my components easier. I then routed all of my traces following what the software was telling me, trying to keep everything as clean as possible. I ended up rerouting this board 2 times due to being unhappy with how it turned out the first few times.
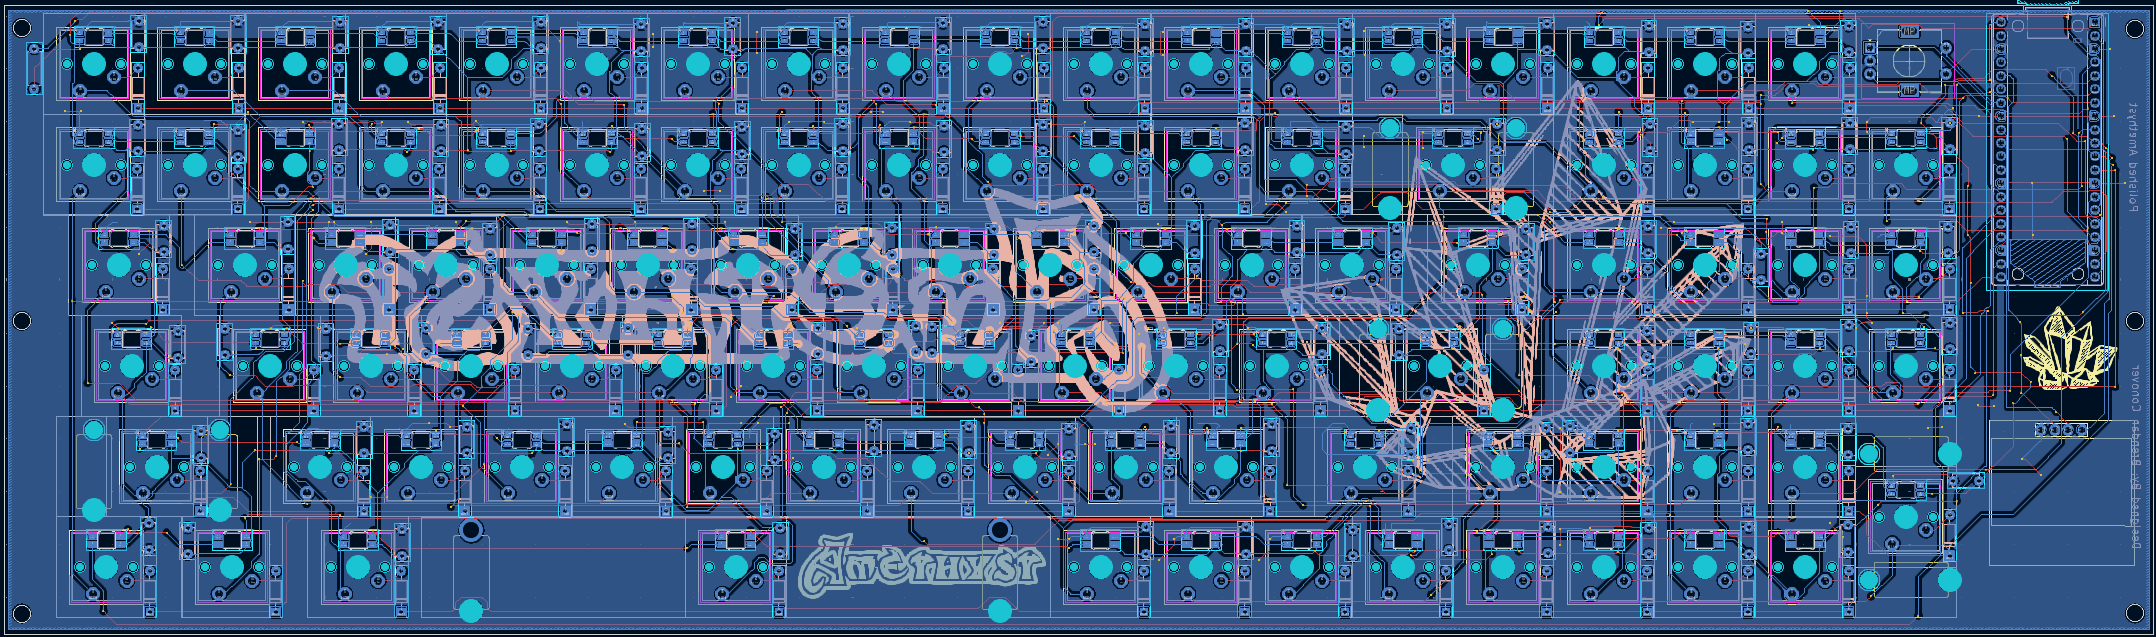
After I was happy with how my board was routed, I set as many components with a .step file as I could before exporting the board for case design. I also added a fun silkscreen to the board to show off the name of the keyboard, Amethyst.
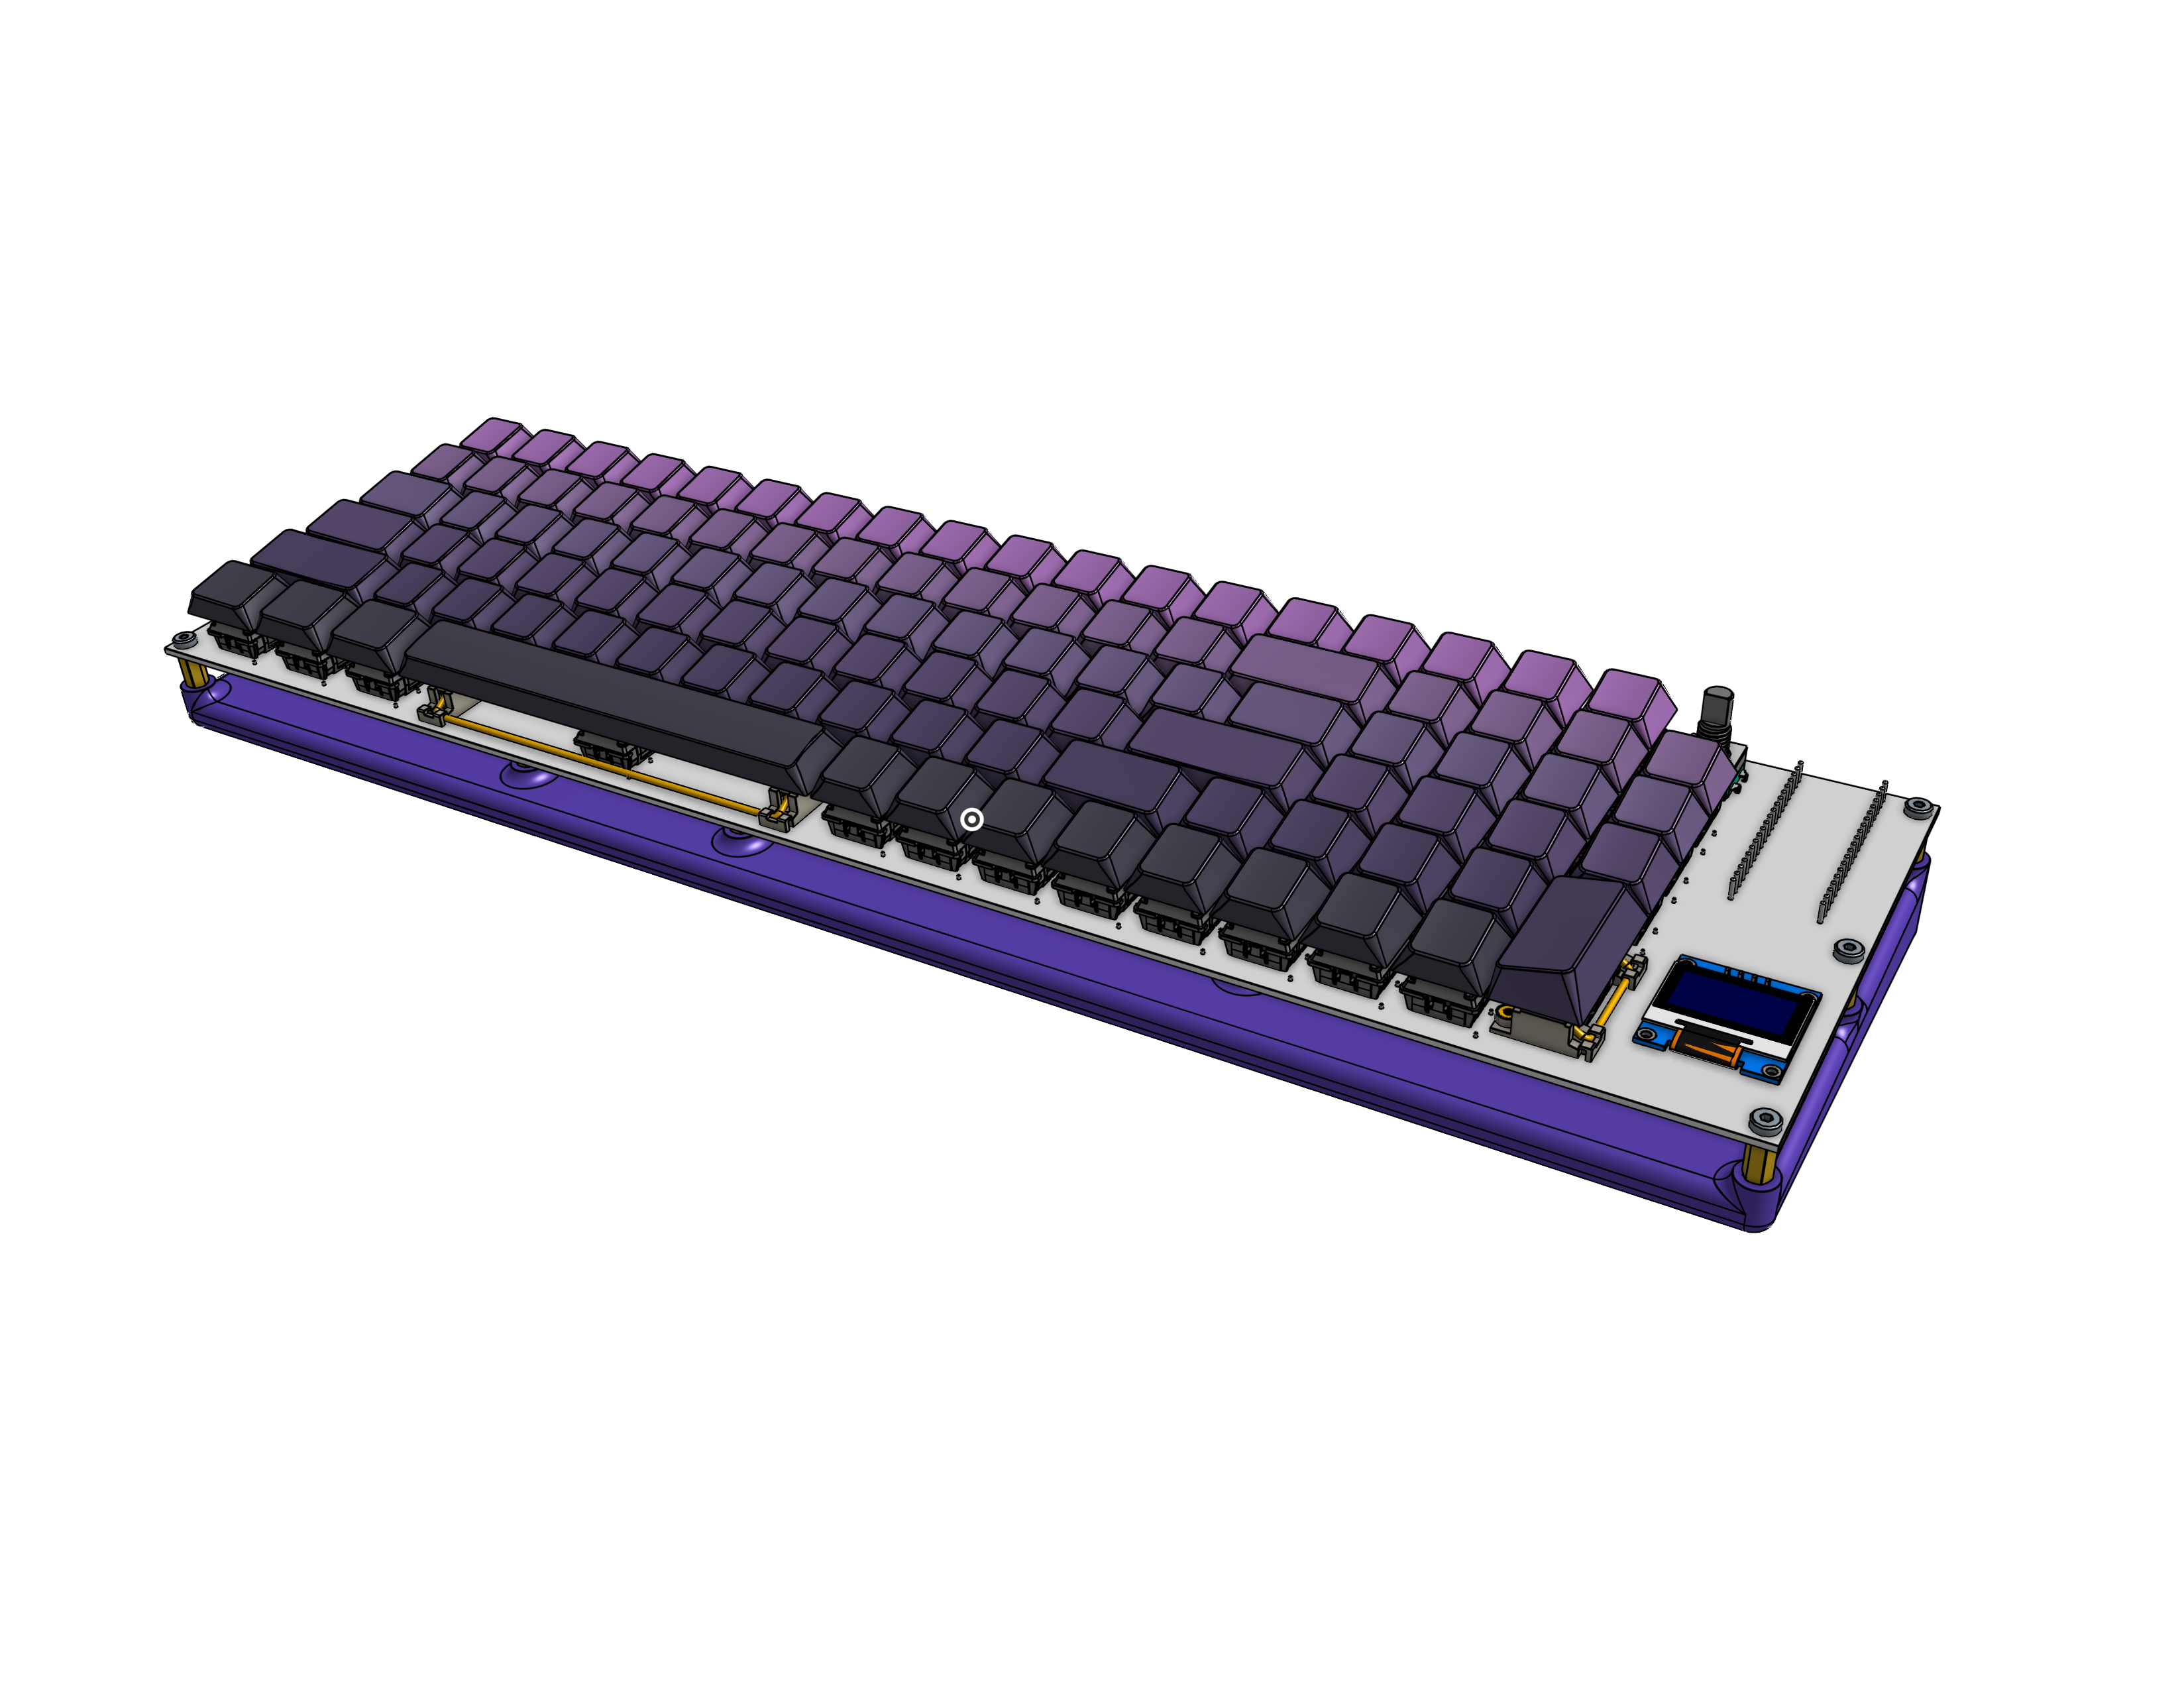
Case Design
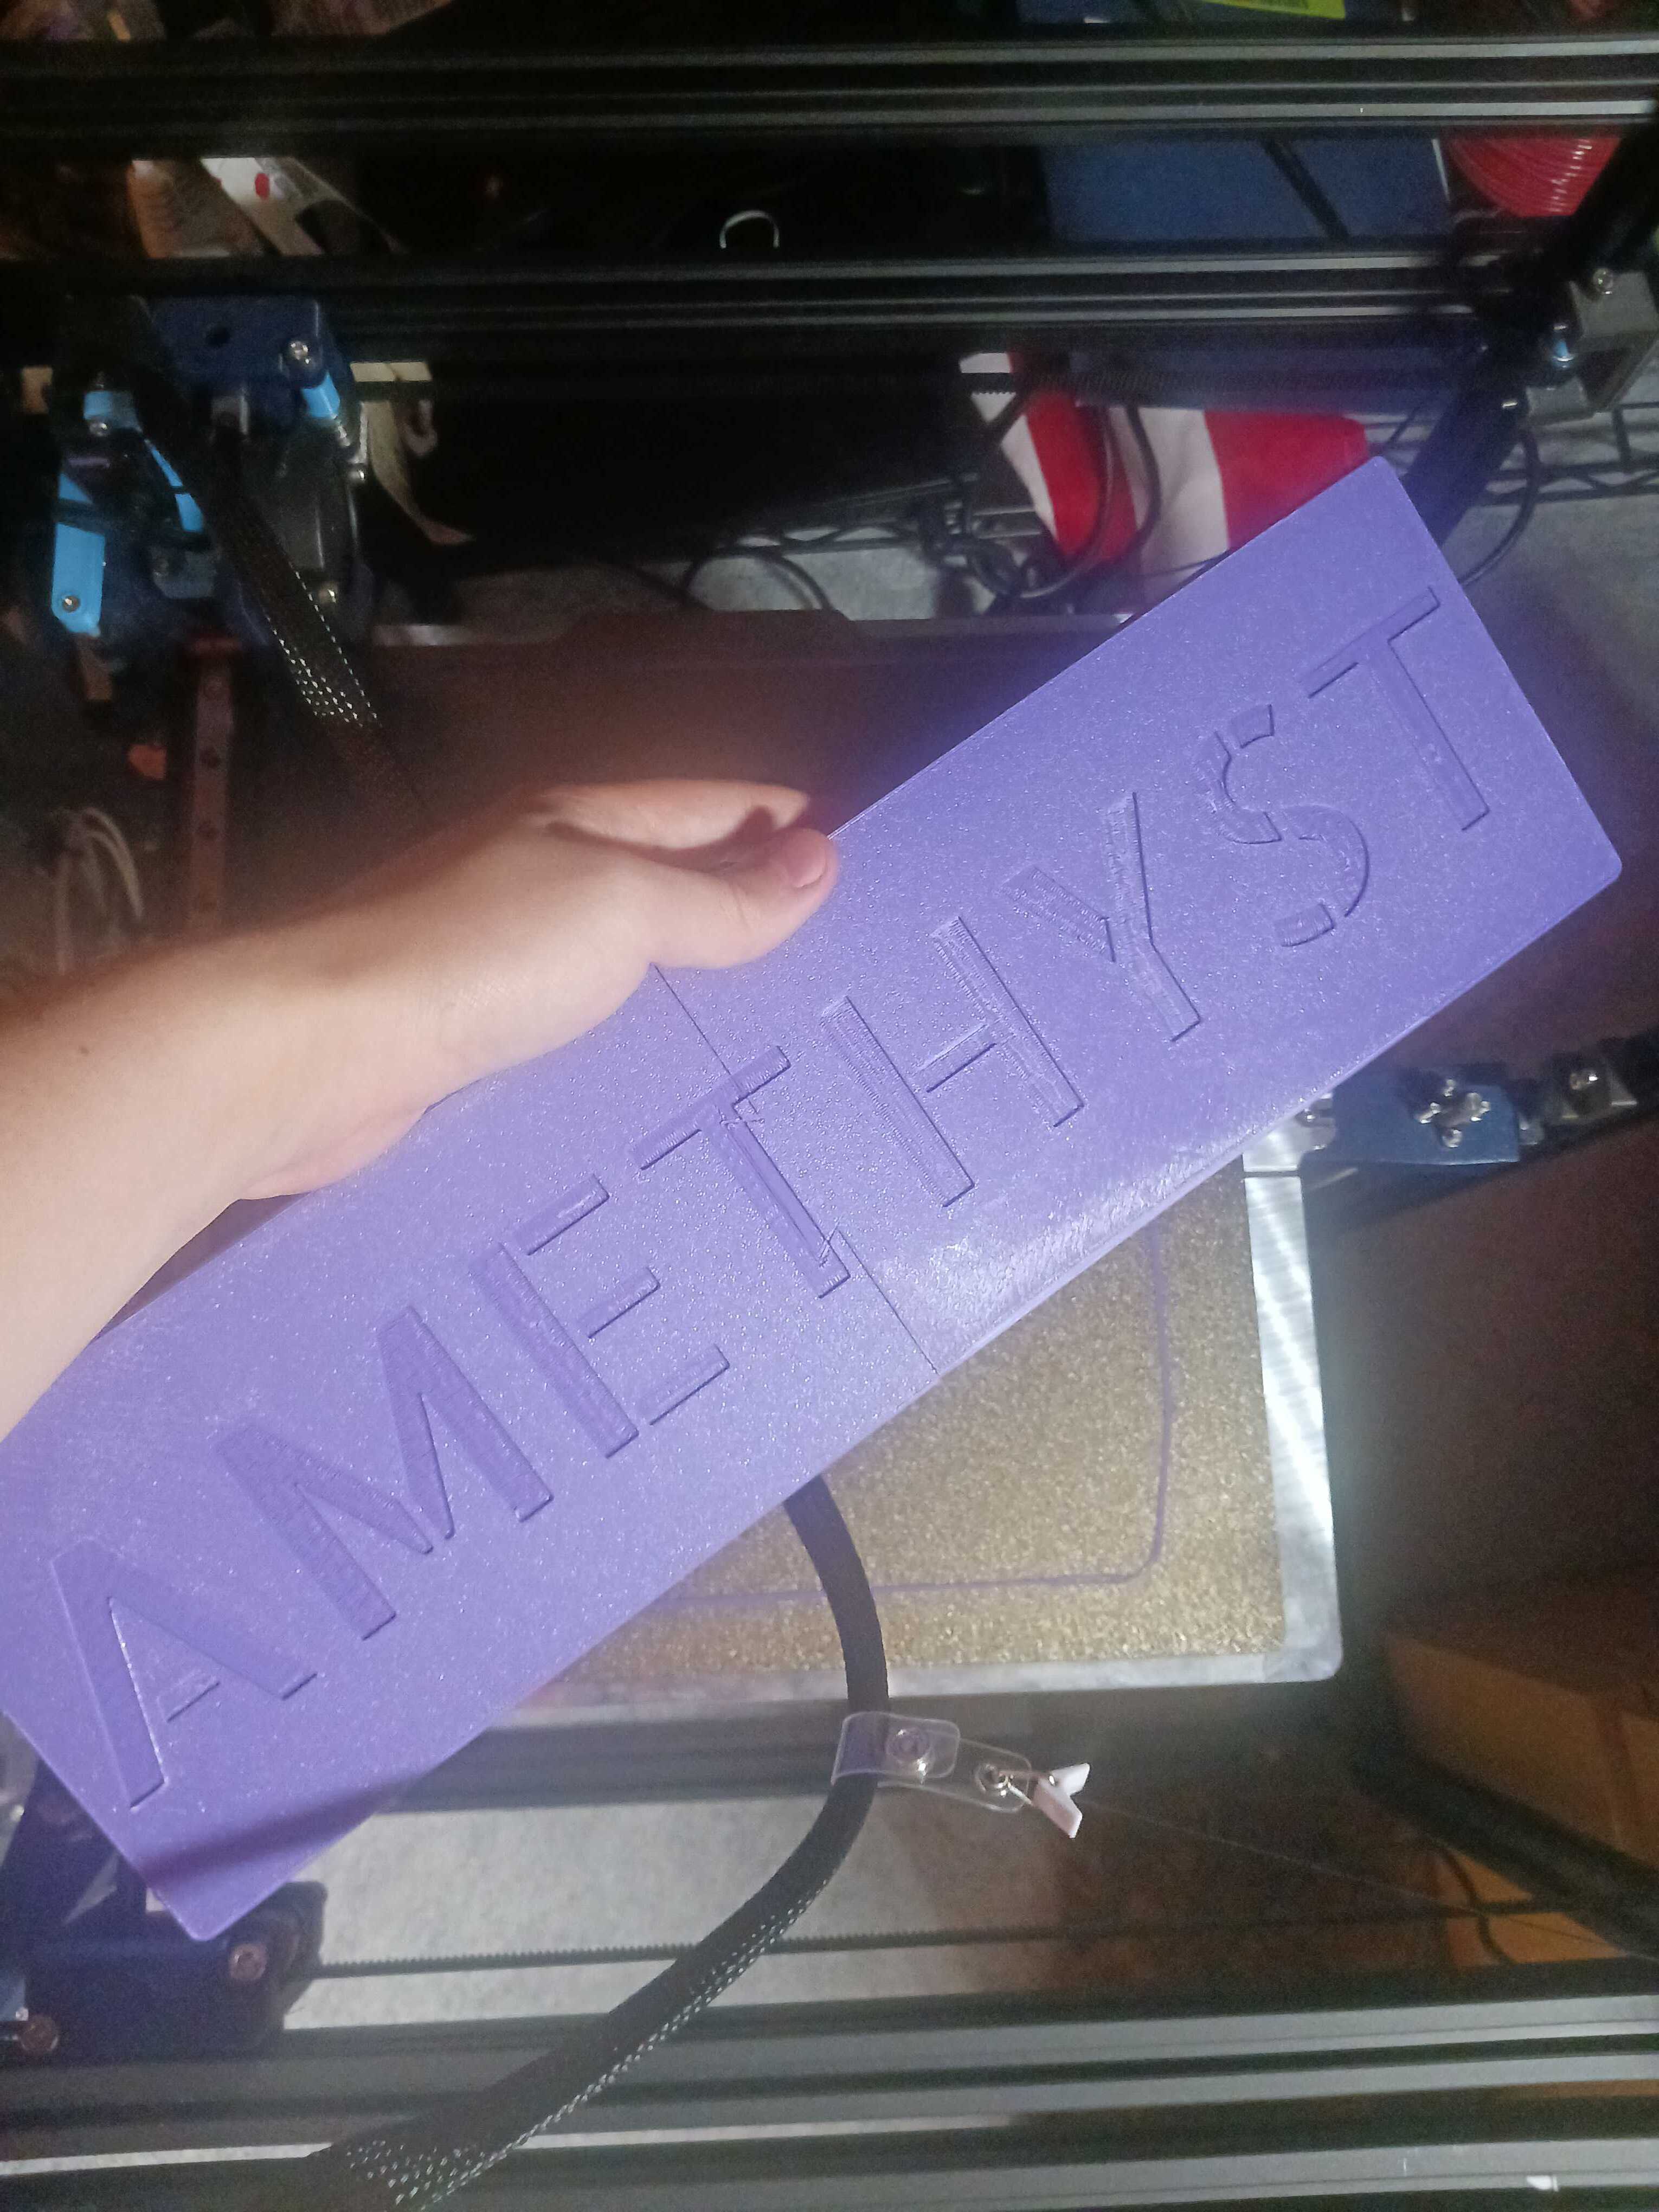
I designed the case in Onshape. I wanted to show off the board and the silkscreen, so I decided on a minimalist design that would put the keyboard at a slight angle while leaving clearance for the soldered components. I made a mount that can be easily printed in 2 parts on any standard size printer. This one was printed on Hydra, my custom large format toolchanger.
Firmware
I used custom KMK firmware that was loaded onto the Pi locally for my keyboard. This allowed me to plug my keyboard into any computer and have it work without needing any firmware on said device. This code can be found on the github.
Final Product
After finishing the design, I ordered the PCB, components, and printed the case. I then soldered and assembled everything together. Pictures of various stages of assembly are shown below.